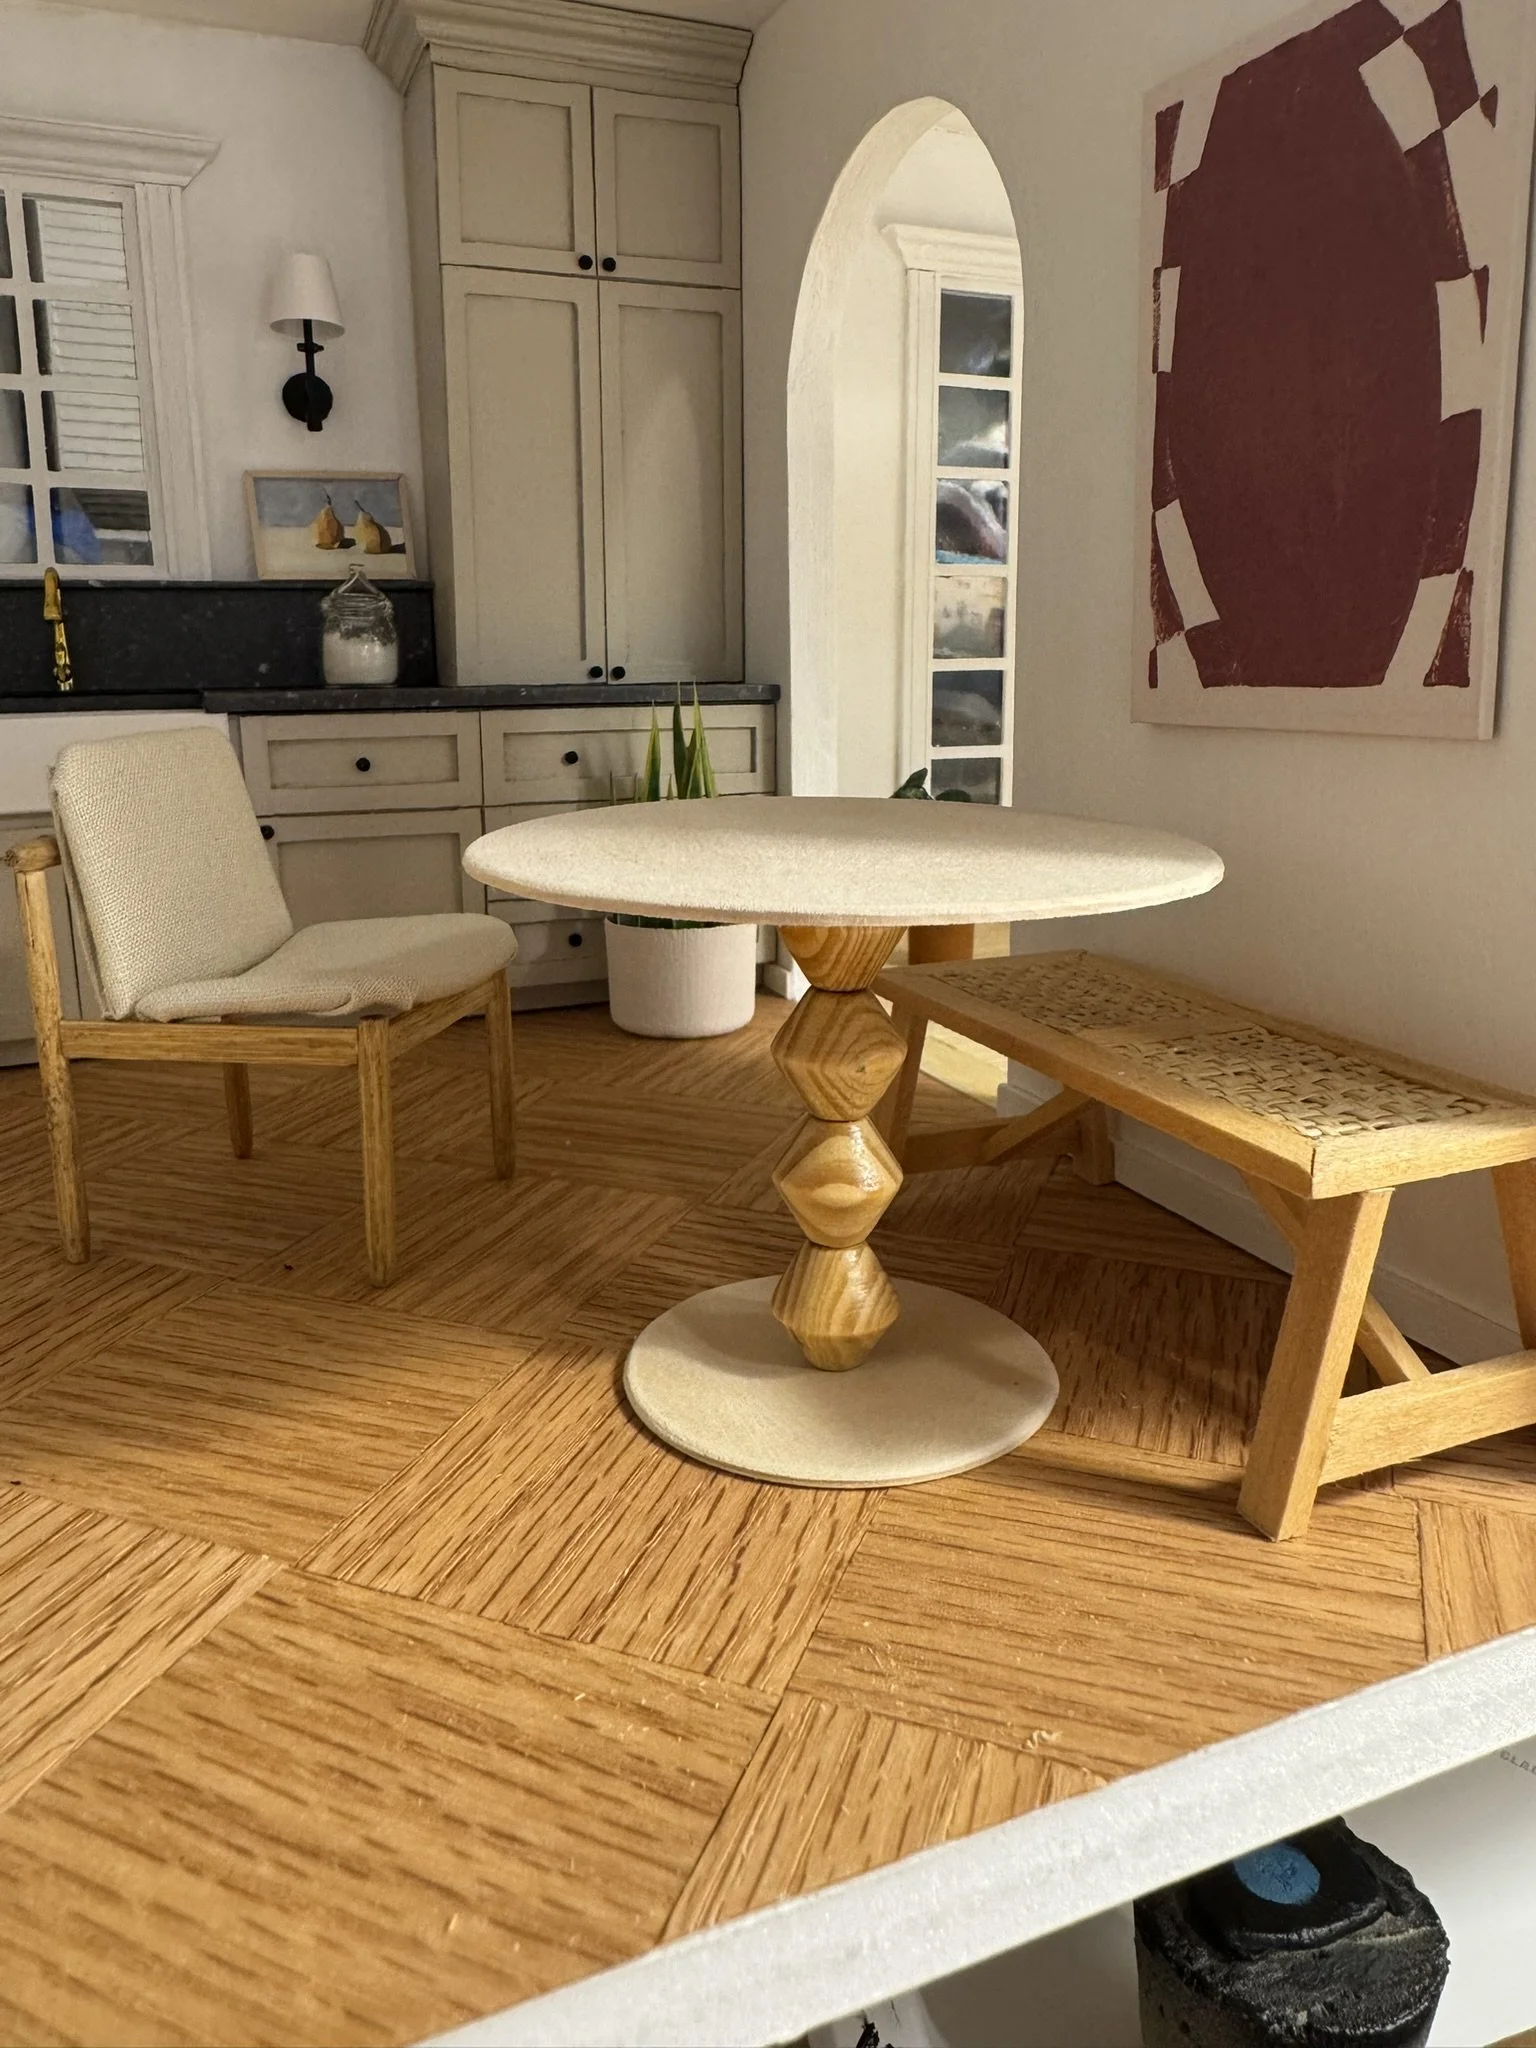
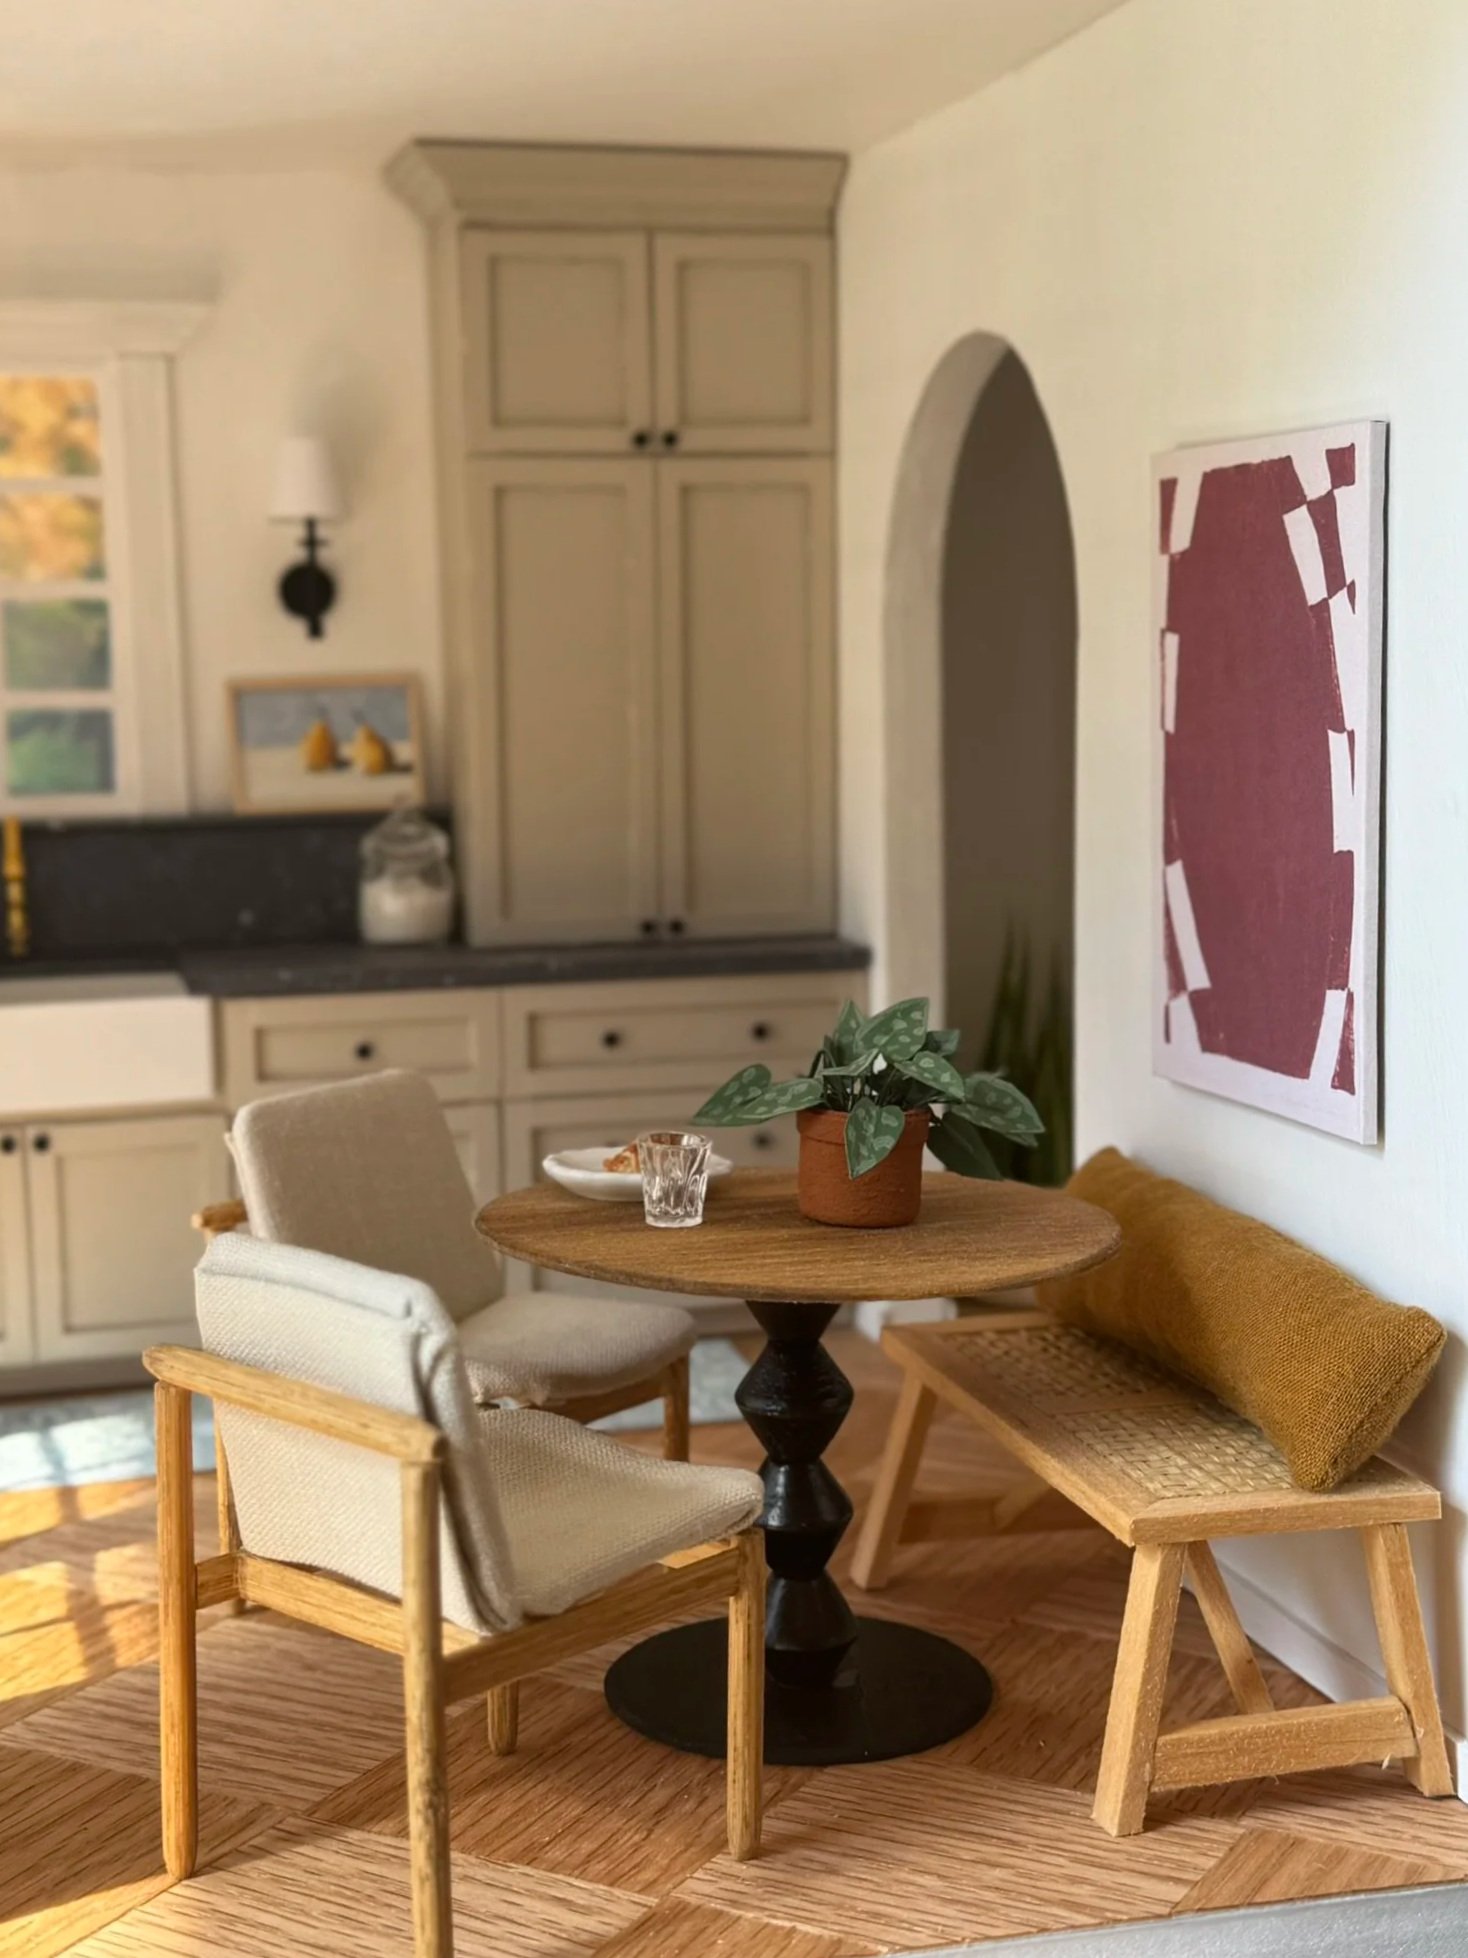
Dollhouse Bistro Dining Table Tutorial

Hard to believe this is my third kitchen table tutorial so far! I have previously made a simple round table and a rectangle table with adorable scallop details. This small bistro table tutorial is great for kitchens with tight spaces, like the one I built here. It can fit 4 smaller dining chairs, or place it alongside a wall with a bench. This is a really simple DIY for beginners just getting into dollhouse furniture!
Materials
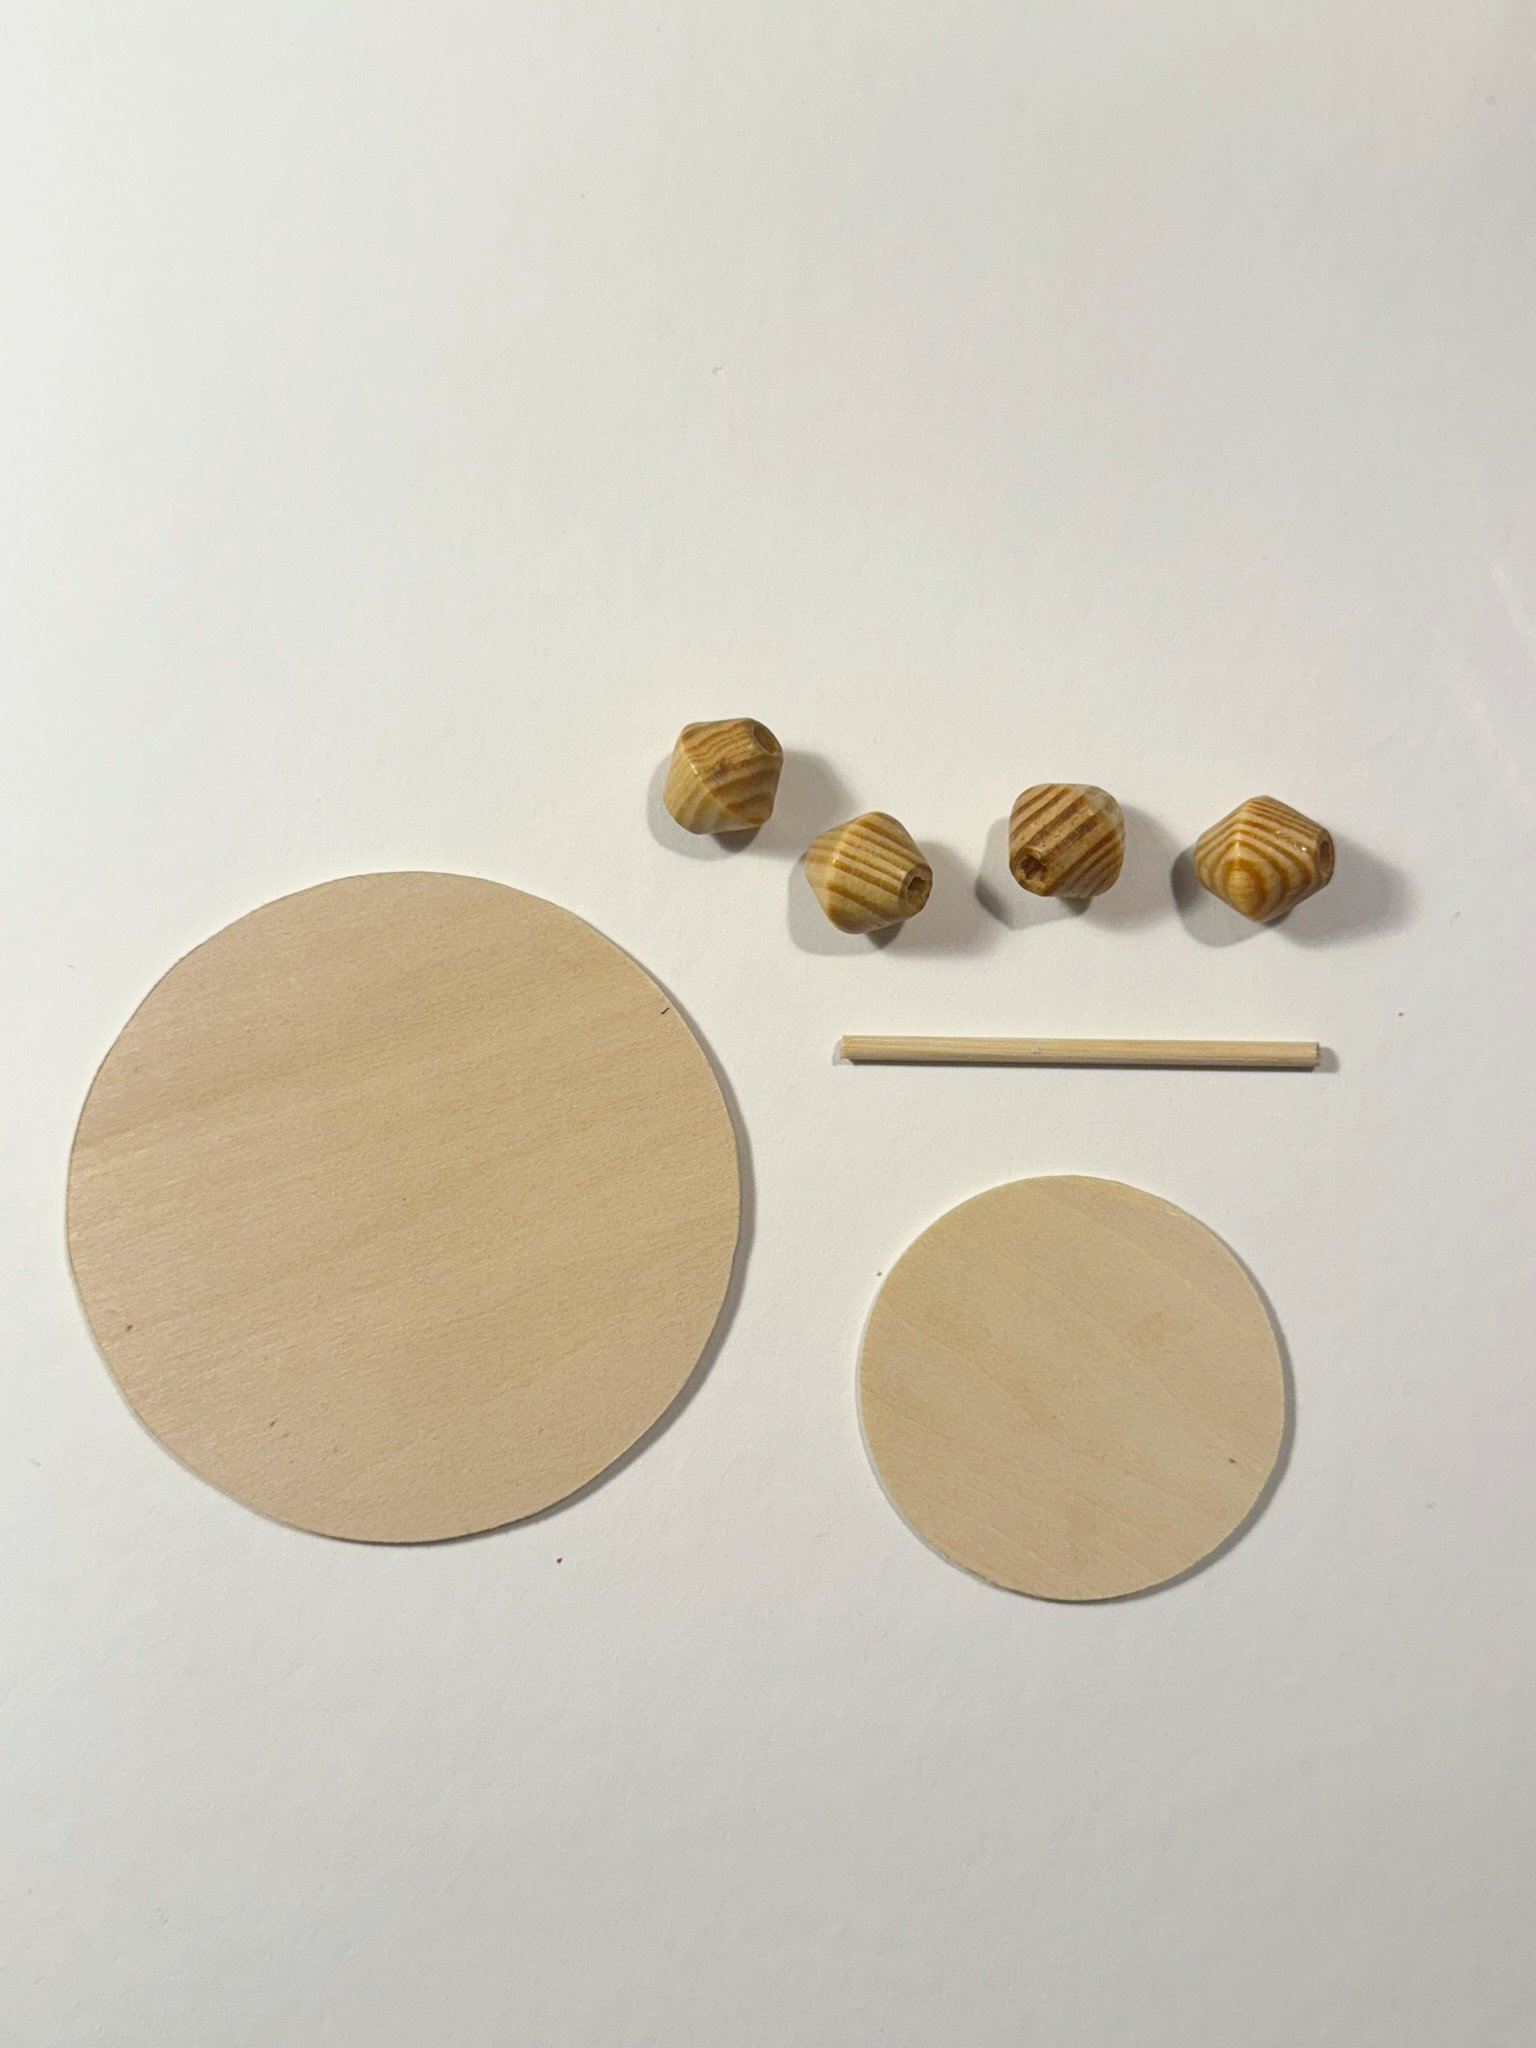
1/16” thick basswood sheets*
Or, purchase pre-cut wood circles like these
X-Acto knife
Hand saw or Miter Shears
Sand paper
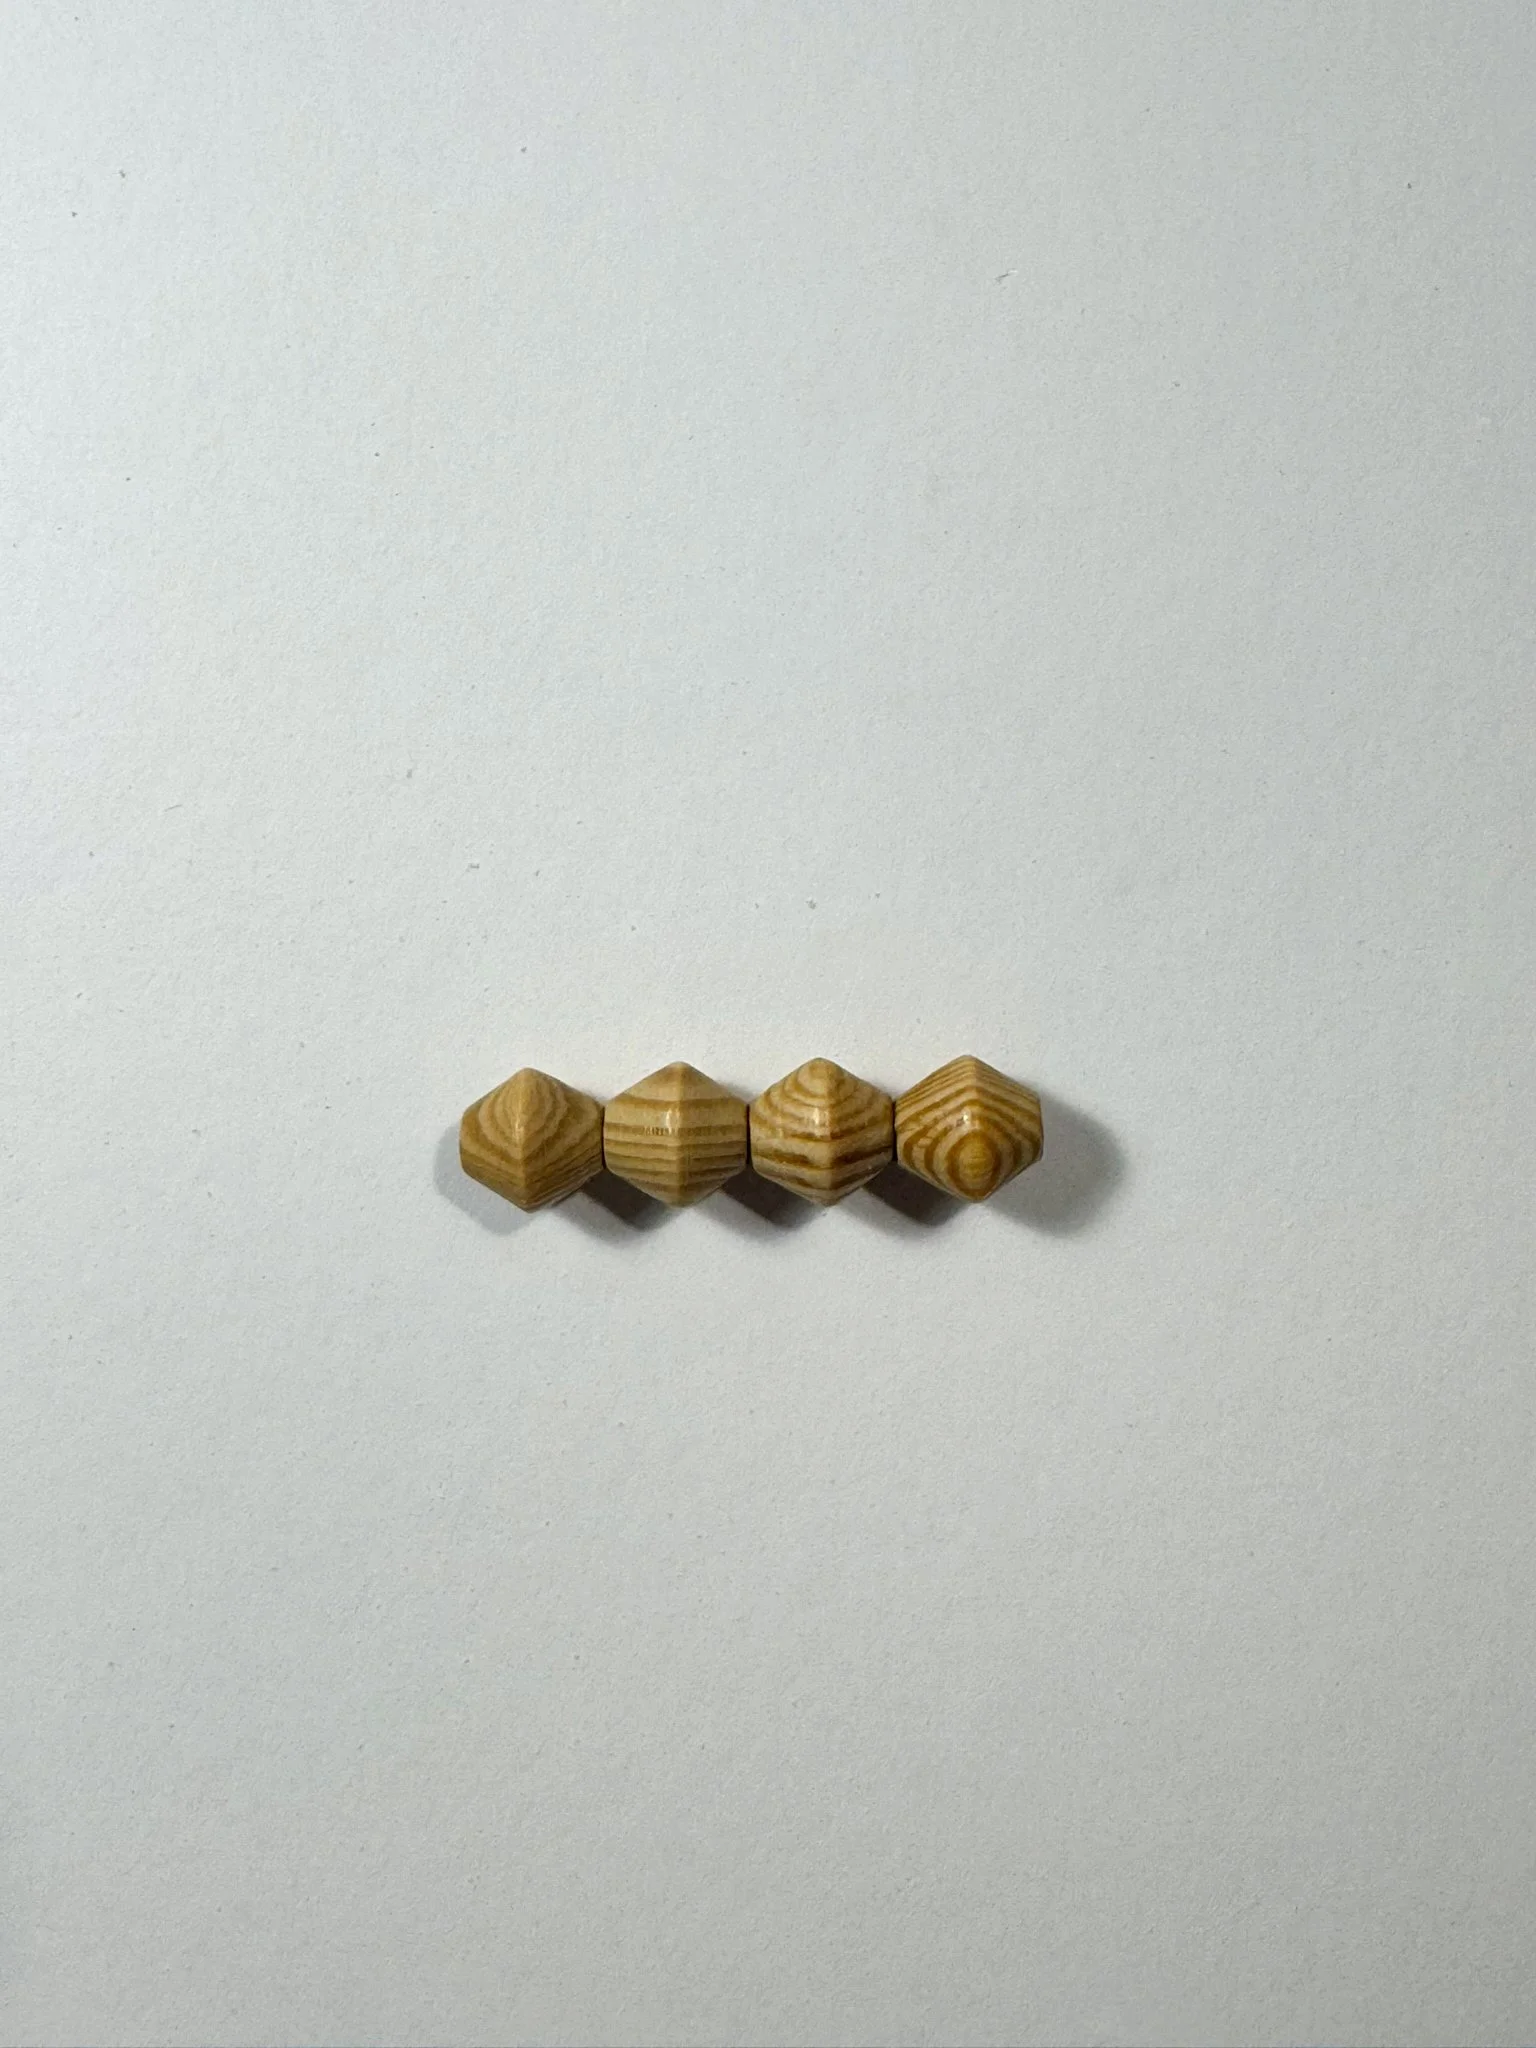
Wood Beads - I used similar ones as these
Paint and/or wood stain
*Note: Basswood is not the same a balsa wood. Balsa wood is much softer and porous. I prefer to work with basswood.
Dollhouse Table Tutorial, 1:12 Scale
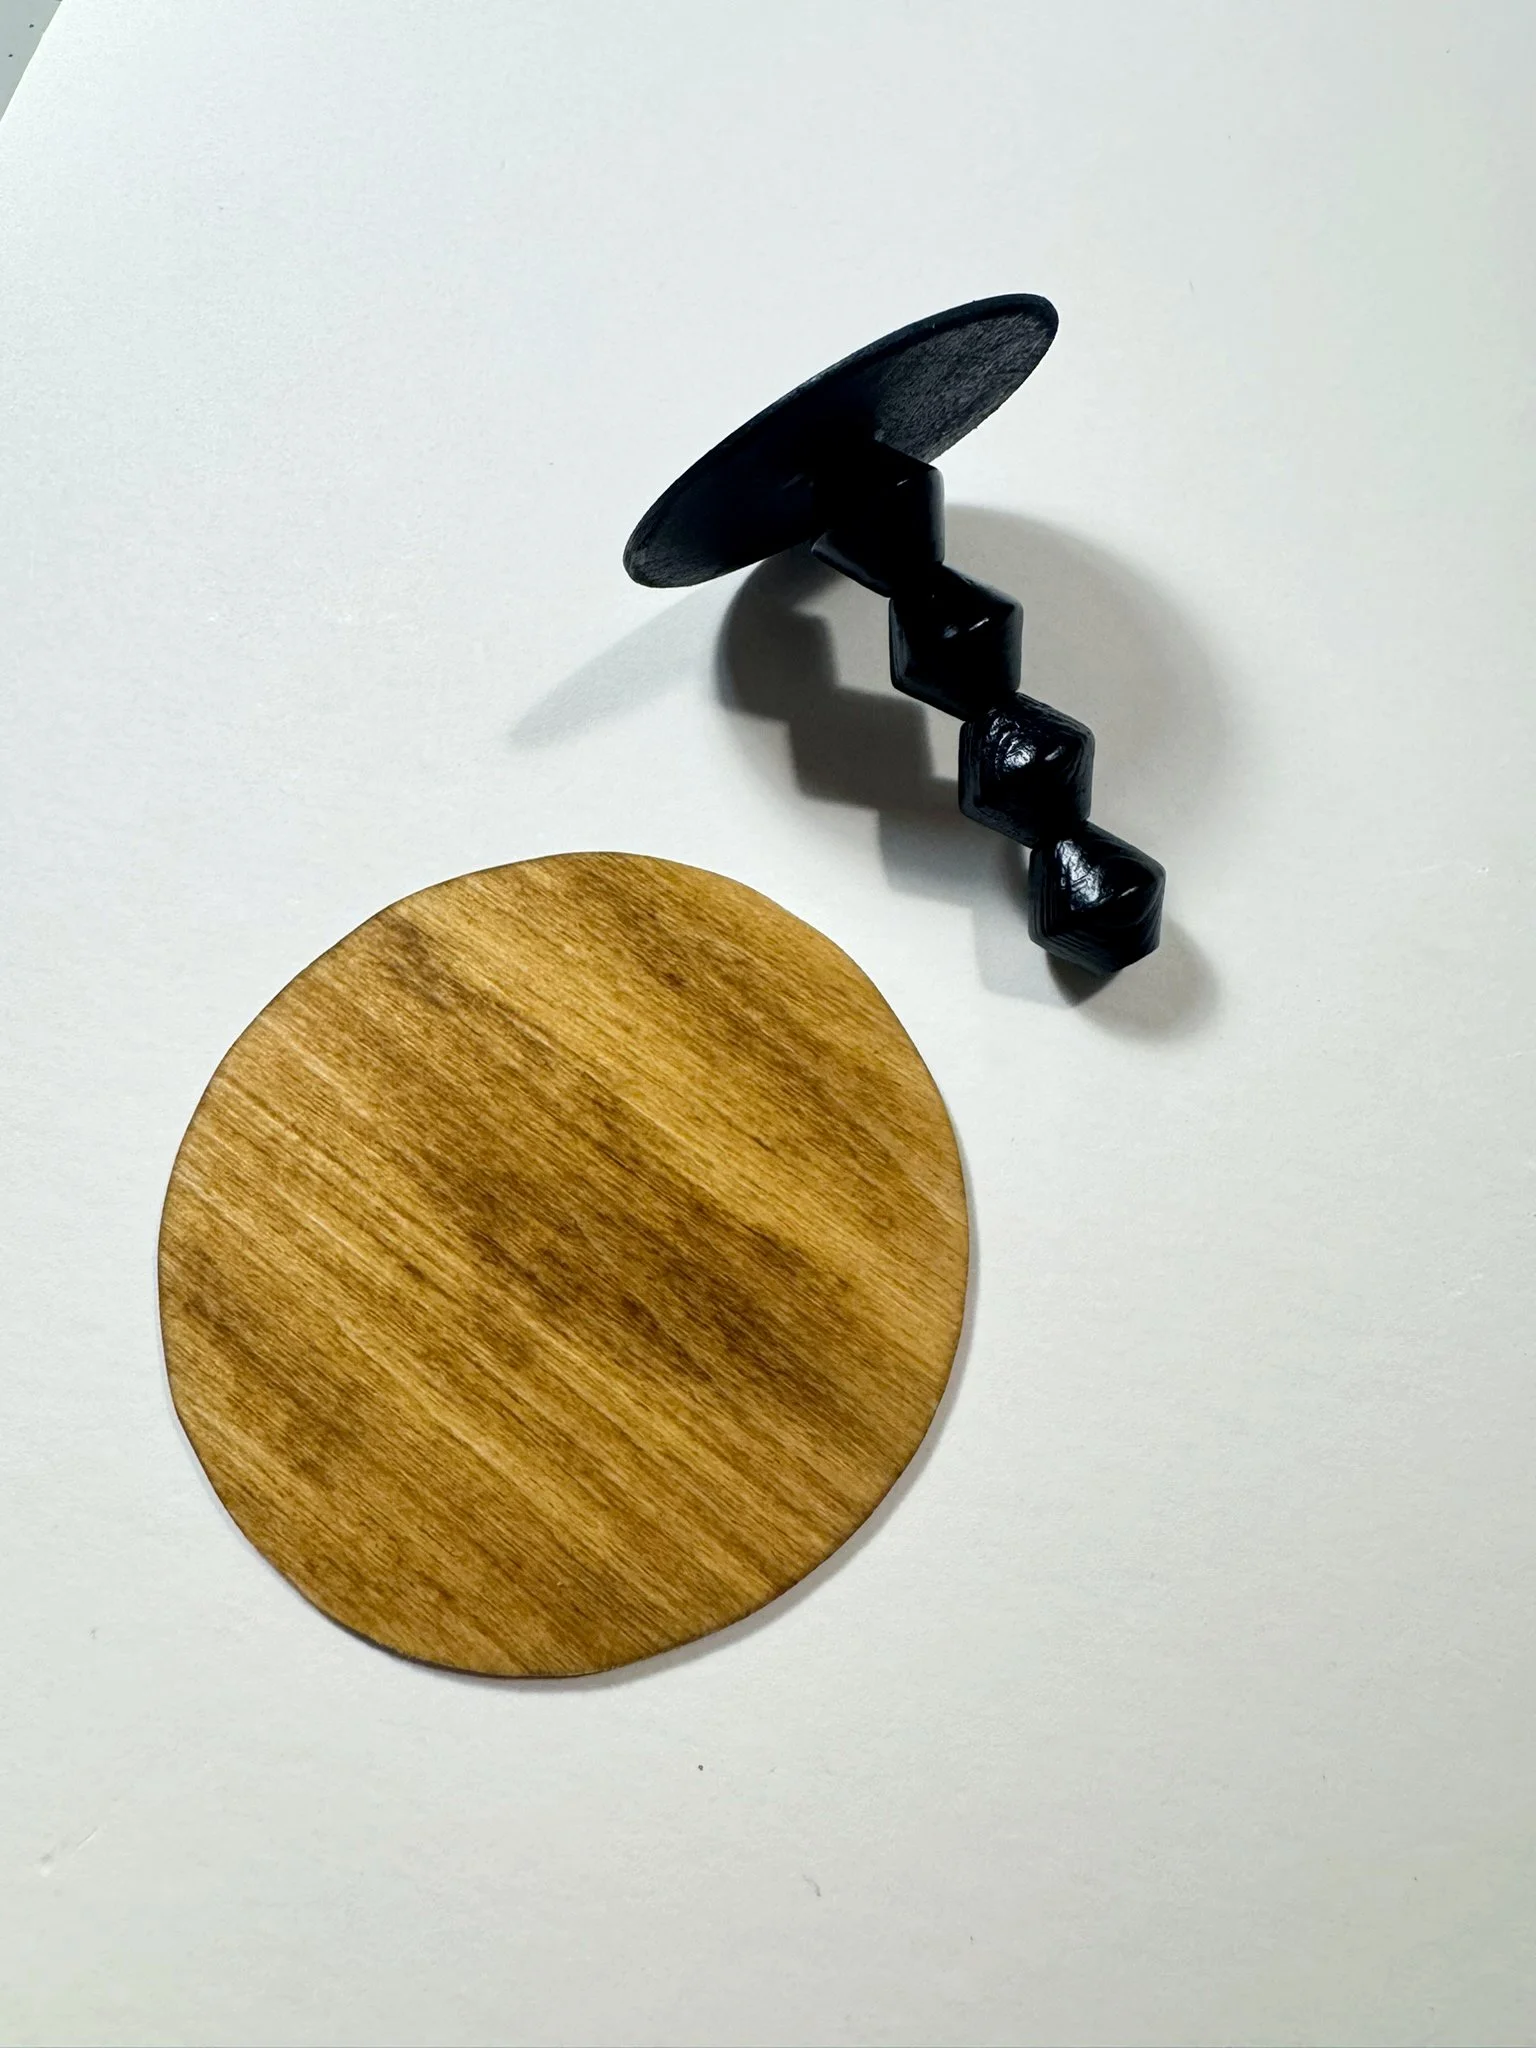
Begin by cutting out 2 circles from the basswood sheets. The 1/16” sheet is thin enough to cut with an X-acto knife by hand. I used a compass (nerd alert!) to draw a 3.5” circle and a 2” circle and cut around each diameter with my craft knife. This will serve as the table base and the top. You can sand down the edges a bit to cover any uneven cuts or taper the edge softly.
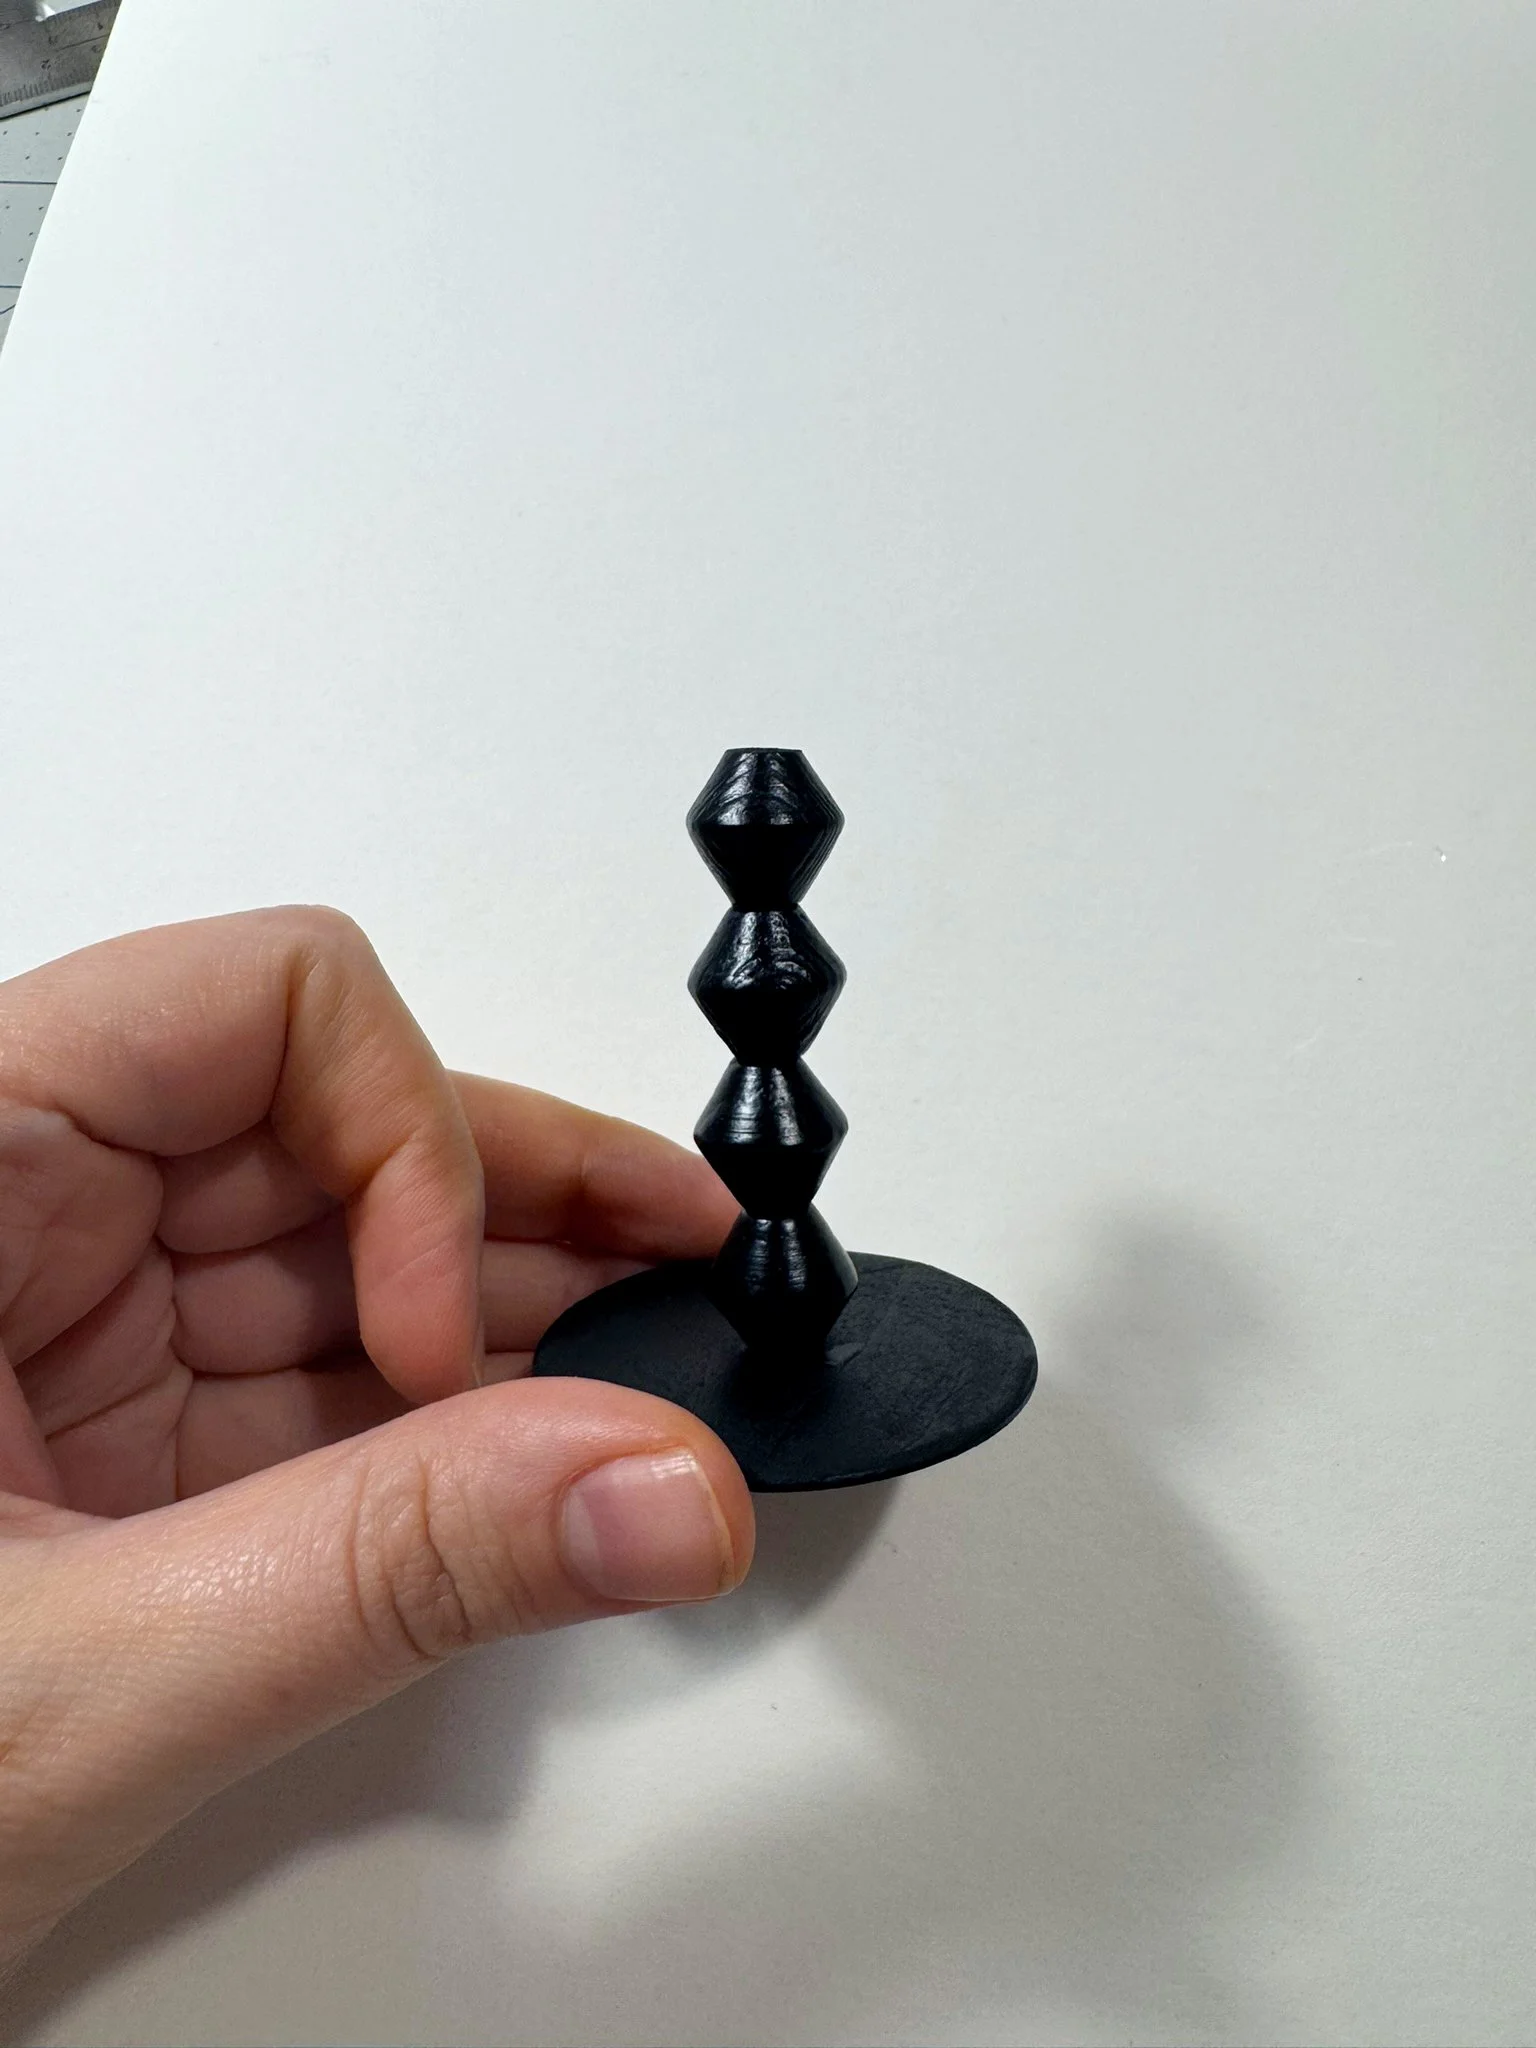
Cut the bamboo skewer to 2.75” tall, using a small handsaw or the miter shears. Sand the end flat, and thread 3-4 beads onto the skewer securing with glue.
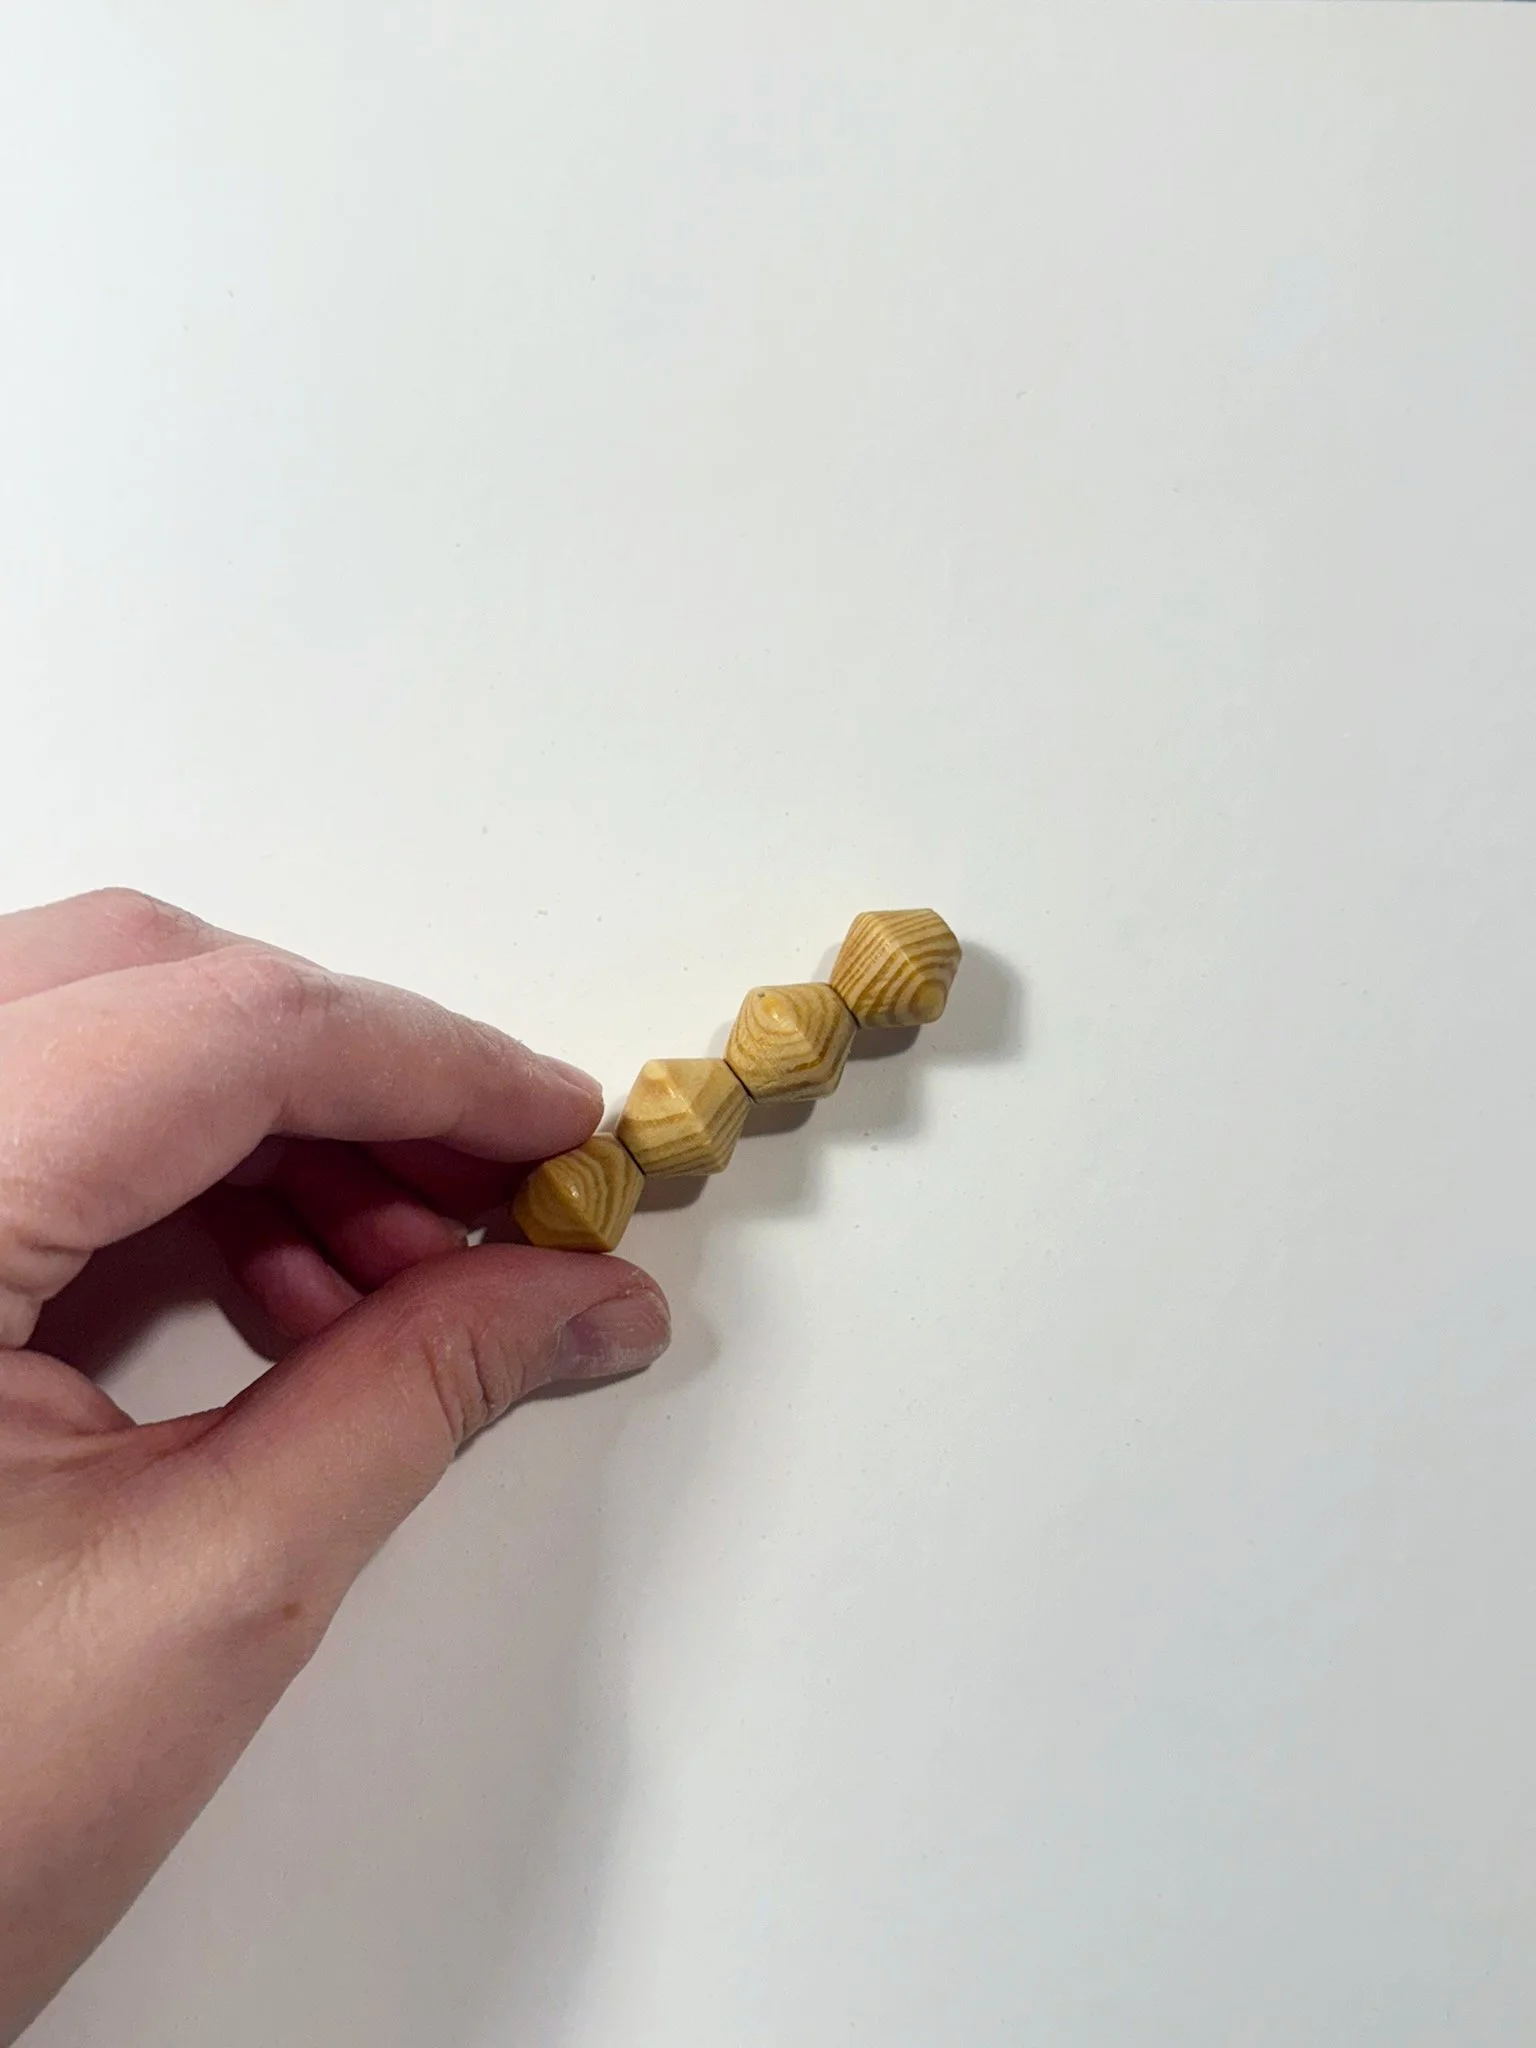
After the table leg has dried, you may need to sand the ends further so it is completely flat. My wooden beads were slightly angled on the ends, so I had to add this extra step. Before painting or glueing, I did a dry test fit to make sure everything was sitting level.
Glue the table leg into the center of the smaller wood circle to make the base. I spray painted my table base with black matte spray paint.
Stain or paint the table top if desired. Glue the table top to the table base - and that’s it! Turn your table around a couple times to make sure no pieces are tilted while the glue dries!