Dollhouse Kitchen Table DIY

After finishing the Shaker Style Kitchen in my dollhouse, I needed a table to fit in the center of the room. I based this scalloped-style table off a piece on Amber Interiors Shoppe since it has a simple structure that is easy to DIY. The detail on the table skirt is very do-able with a craft knife and gives this piece an extra artisan touch. The real-life table also has a Tear Sheet (self-hosted pdf) provided by Amber Interiors where you can reference exact measurements and a line drawing of the scallop edge to trace.
Materials
Basswood:
3/32” thin basswood sheet
1/4” x 1/4” square strip
1/8” x 1/4” strip
Stain or paint
Sandpaper
1:12 Table Tutorial
Start by cutting out all the pieces you will need for the table. See the cut list below:
Cut from the 3/32” basswood sheet:
(1) 6” x 3 3/8” rectangle for the table top
(2) 2 1/8” x 3/8” rectangles for the skirt
(2) 4 1/4” x 3/8” rectangles for the skirt
Cut from the 1/4” x 1/4” square strips:
(4) 2 1/2” strips for the legs
Cut from the 1/4” x 1/8” strip:
(2) 2 1/8” strips for the bottom support
(1) 4 3/8” strip for the bottom support
I used a medium grit sandpaper to smooth the edges of the table top and round the corners.
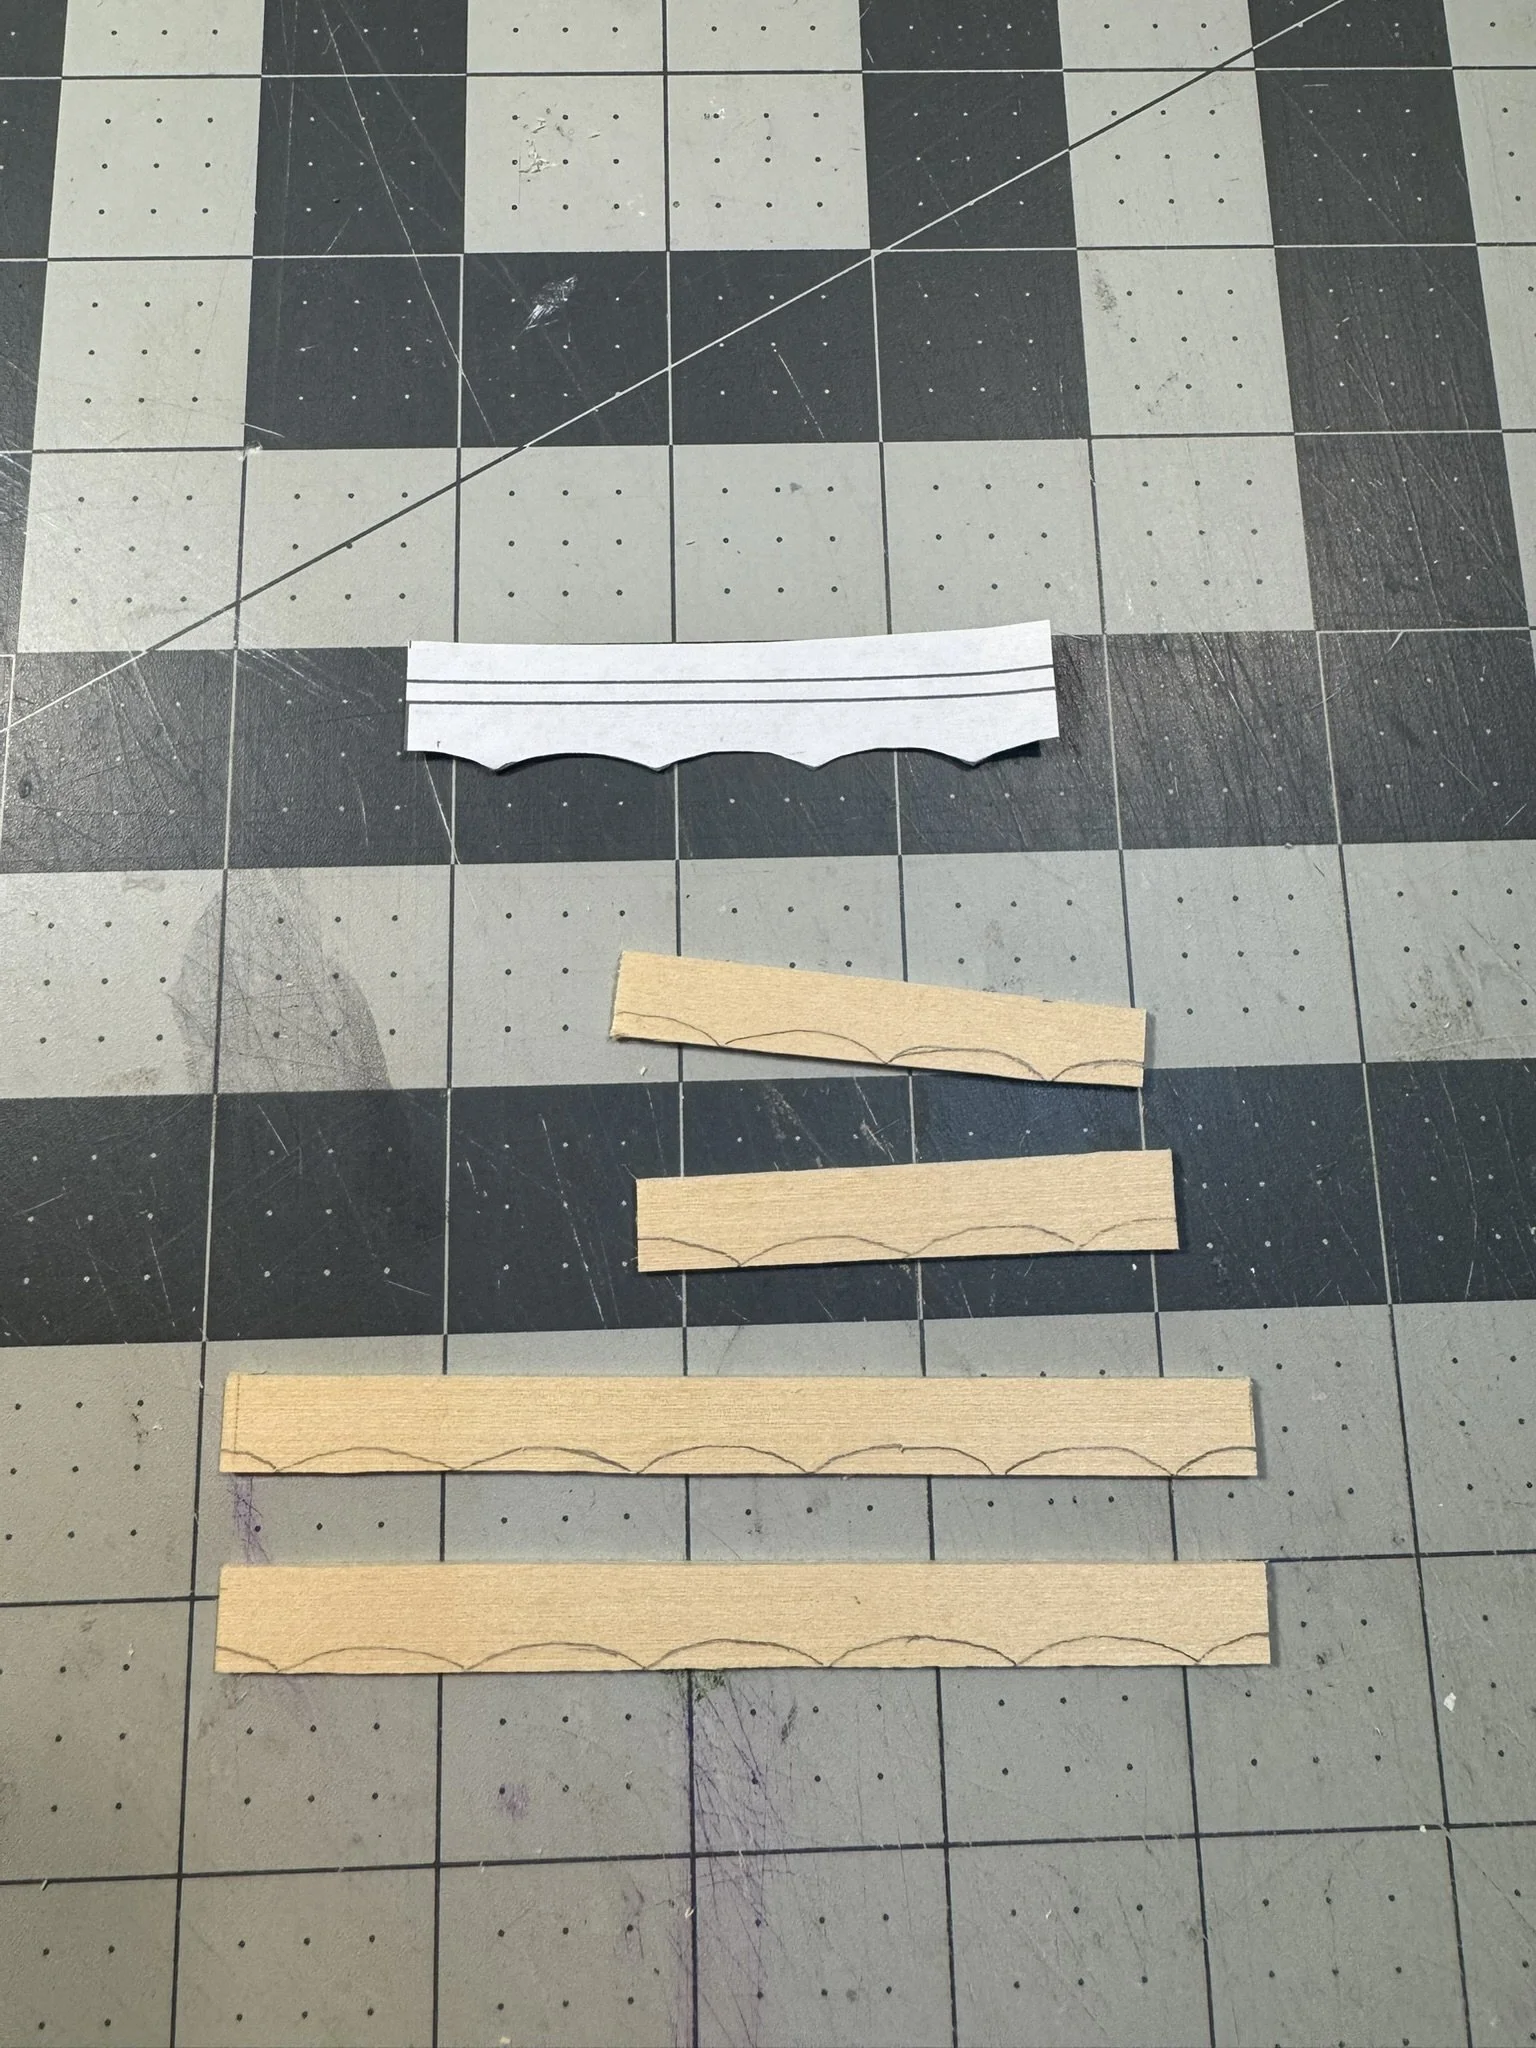
To create the scalloped table skirt, print out this product tear sheet (self-hosted PDF), and cut out the scalloped pattern on page 3. Trace this onto your table skirt pieces and cut it out with a craft knife. The really thin basswood is easy to cut, but go slow around the pointed corners as they can be fragile.
If you are staining your table, you can apply the stain at this point. I find that staining wood prior to assembling avoids the pale spots where leftover wood glue would otherwise show. So, stain each individual piece before you glue it all together.

First assemble the longer side of the table base. Grab 2 table legs and the 1 long table skirt piece. Glue the skirt to each leg flush to the outside corner of the leg (see picture 2). You can use a grid on your work surface or a few blocks of legos to make sure all the angles are 90 degrees. Repeat for the other long side of the table base.


Once this is fully dried, you can add in the shorter pieces of the scalloped table skirt to create the rectangular table base. I let my table base sit upside down.
While this dries, you can glue together the bottom supports into a capital “I” shape. See the background of Image 1 below, as I apparently did not photograph this step!


Glue the bottom “I” support in between the table legs, approximately 1/2” from the ground. You can use some extra lego bricks or wood scraps to support the glue while it dries. Next, you are ready to glue the table top onto your assembled base, and call it quits!


This kitchen table was surprisingly quick to make for my dollhouse! The trickiest part is cutting out the scallops, and you could even skip that detail if you preferred a straight table skirt.
Follow along on Instagram for more dollhouse DIYs and behind the scenes progress!


