Rattan Dollhouse Bed Tutorial

Inspired by this rattan bed from West Elm, I first made this style in 2023. But since launching this blog, I have not yet shared a full bed tutorial! See this previous tutorial for a headboard. I decided to revisit this bed as a tutorial because it is a really simple design and beginner friendly! The hardest part is finding a good rattan material without buying a whole roll of wallpaper. Keep reading for the tutorial and shopping list!
Materials
Rattan Material - see notes below
Basswood Strip Wood - can be found at a local hobby shop, too
Mat board or chip board
Paint of your choice
Tacky Glue and Wood Glue
Sandpaper
Fabric to cover mattress
Felt for mattress padding
Where to Find Rattan Materials
The hardest part of this dollhouse DIY is finding the right material for the rattan panels. Here’s what I have used and some other suggestions depending on availability.
Serena & Lily Natural Raffia Wallcovering Swatch - This is what I used in this tutorial. You will need one swatch at least, but you may want to order an extra to be safe. While the first free swatches are free, they are sometimes out of stock or take a couple weeks to come in. It is a beautiful fabric though, just only available in small quantities unless you splurge for a by-the-yard purchase.
Amazon LUSTROWIN Jute Woven Shade Swatches - The cream color in this swatch kit is perfect. But you will need to order two swatches for this project.
Amazon TWOPAGES M Series Woven Shades or the R Series - Both of these swatch kits have really good options, and you’ll get a couple of extra swatches to experiment with other projects. The swatches are barely too small to cover both sides of the bed, so purchase 2 swatch kits.
Amazon Raffia Mat Table Runner - Takes a long time to arrive, but lots of material for $30.
Etsy Californa Wallpaper Raffia Covering - I have not personally ordered this but it looks very promising.
Etsy Petershams Floral Pattern Embroidered Raffia Straw Fabric - Again, I have not ordered this but the floral border is so cute, and looks like it has potential for other uses!
1:12 Scale Dollhouse Bed Tutorial
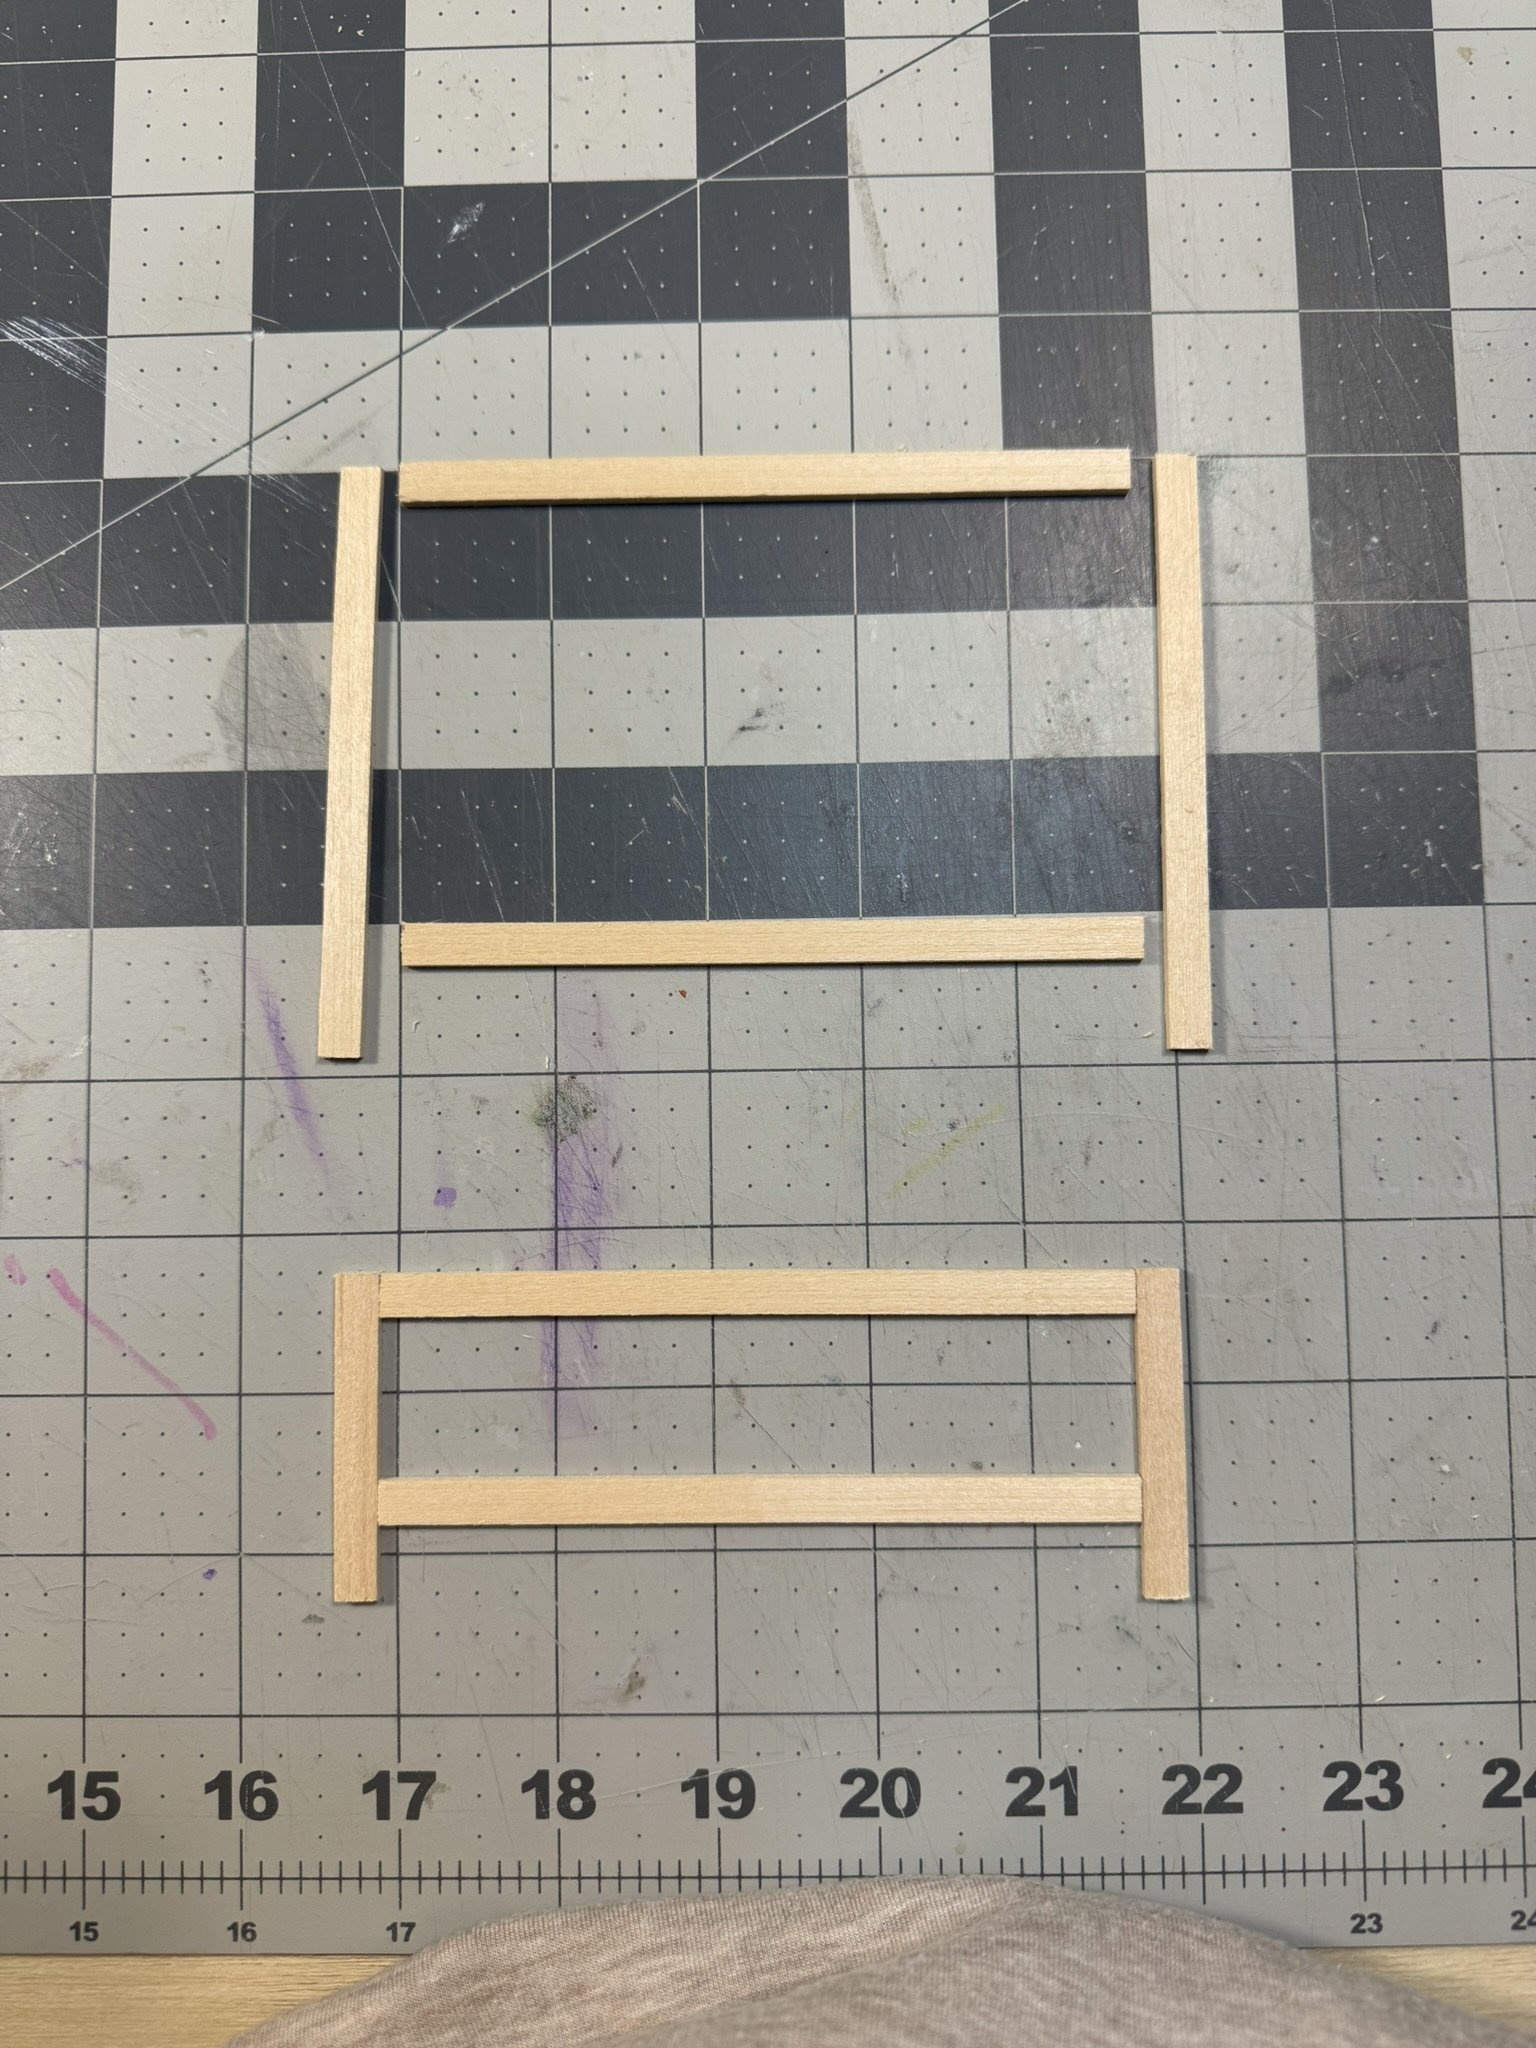
Start by cutting out the basswood strips into the necessary pieces. See complete list below. These measurements make a king size bed.
Basswood Cut List:
Cut from 1/8 x 1/2 strip:
(2) - 6 1/2” long
Cut from 1/8 x 1/4 strip:
(4) - 4 3/4” long
(2) - 3 7/8” long
(2) - 2” long
(3) - 5 1/16” long
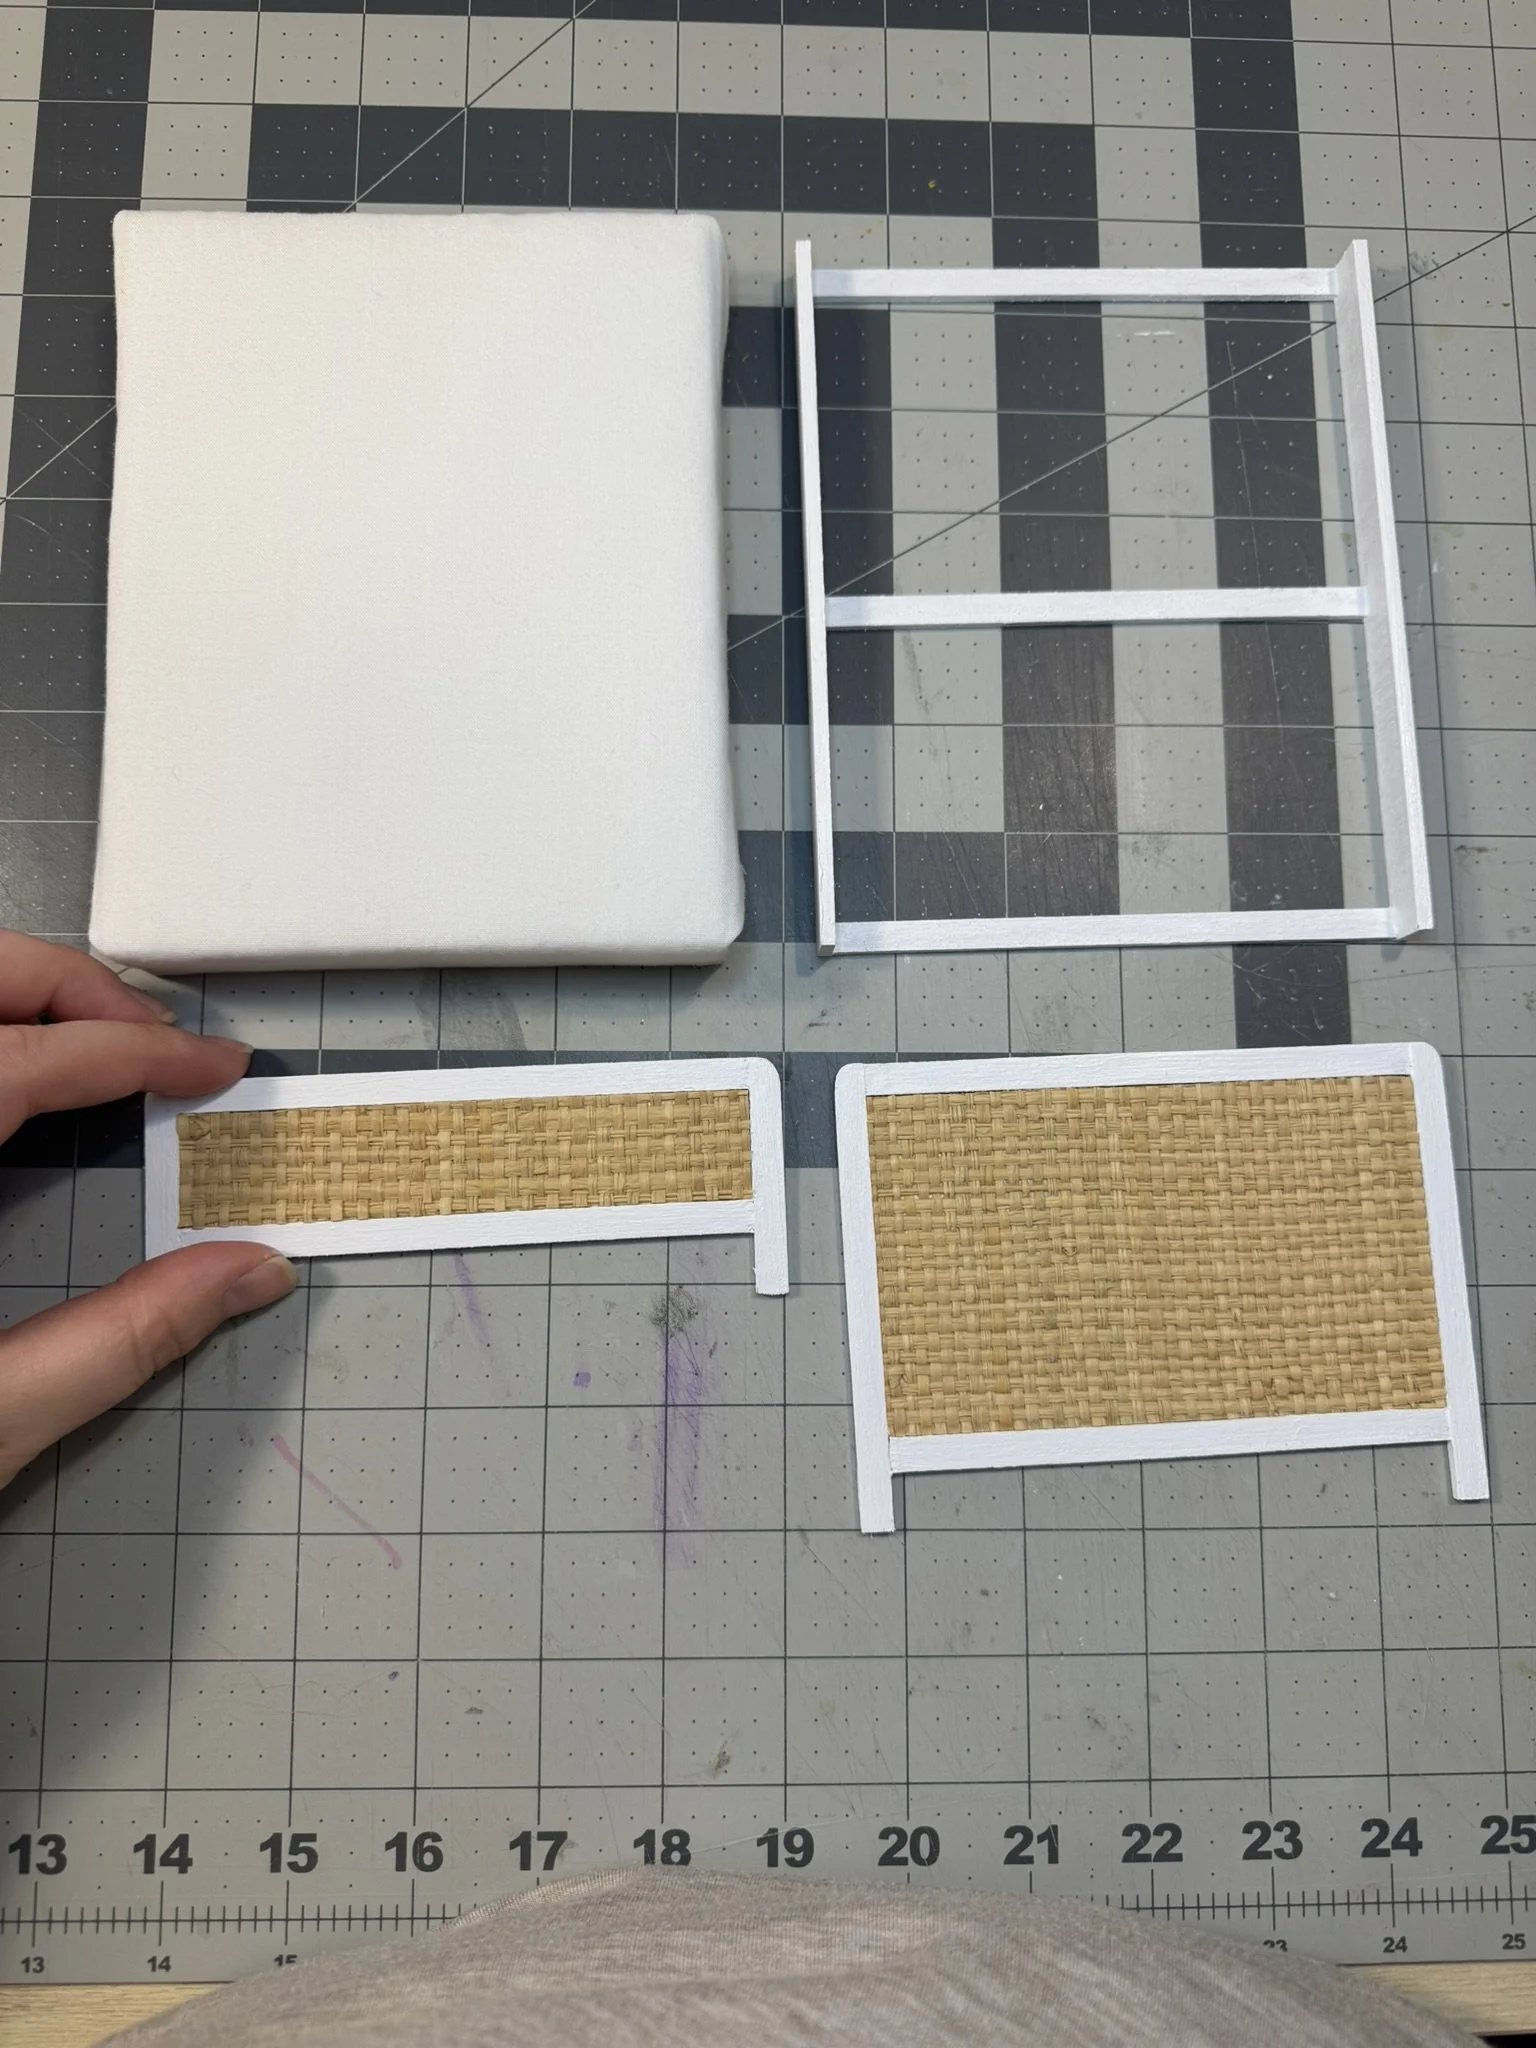
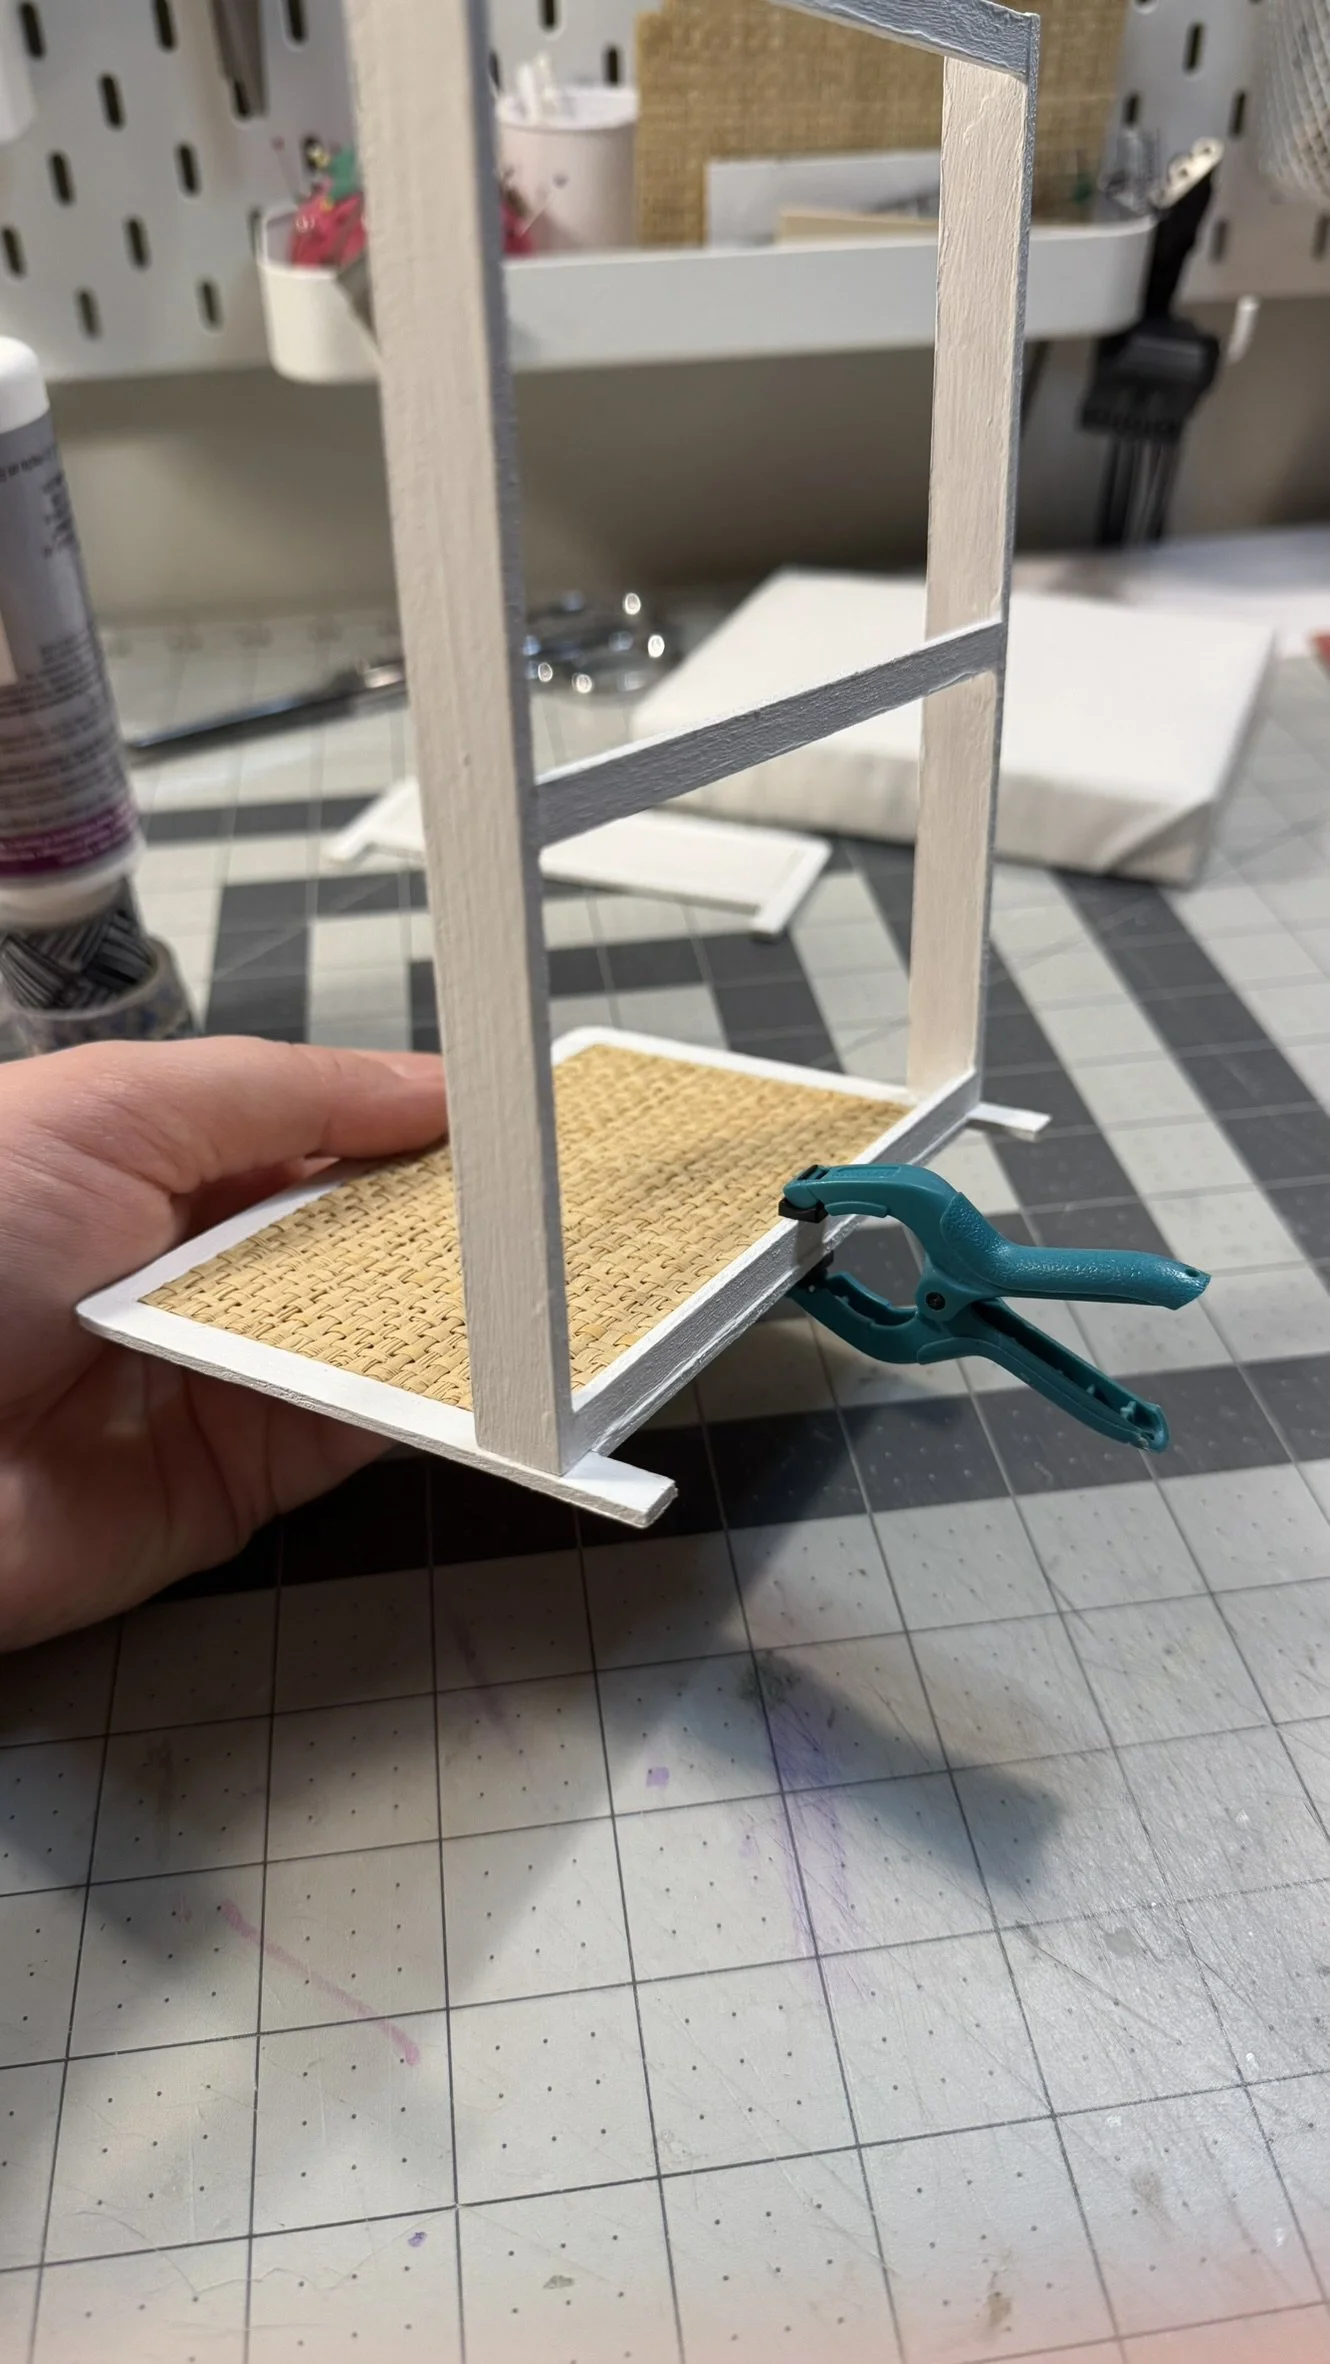
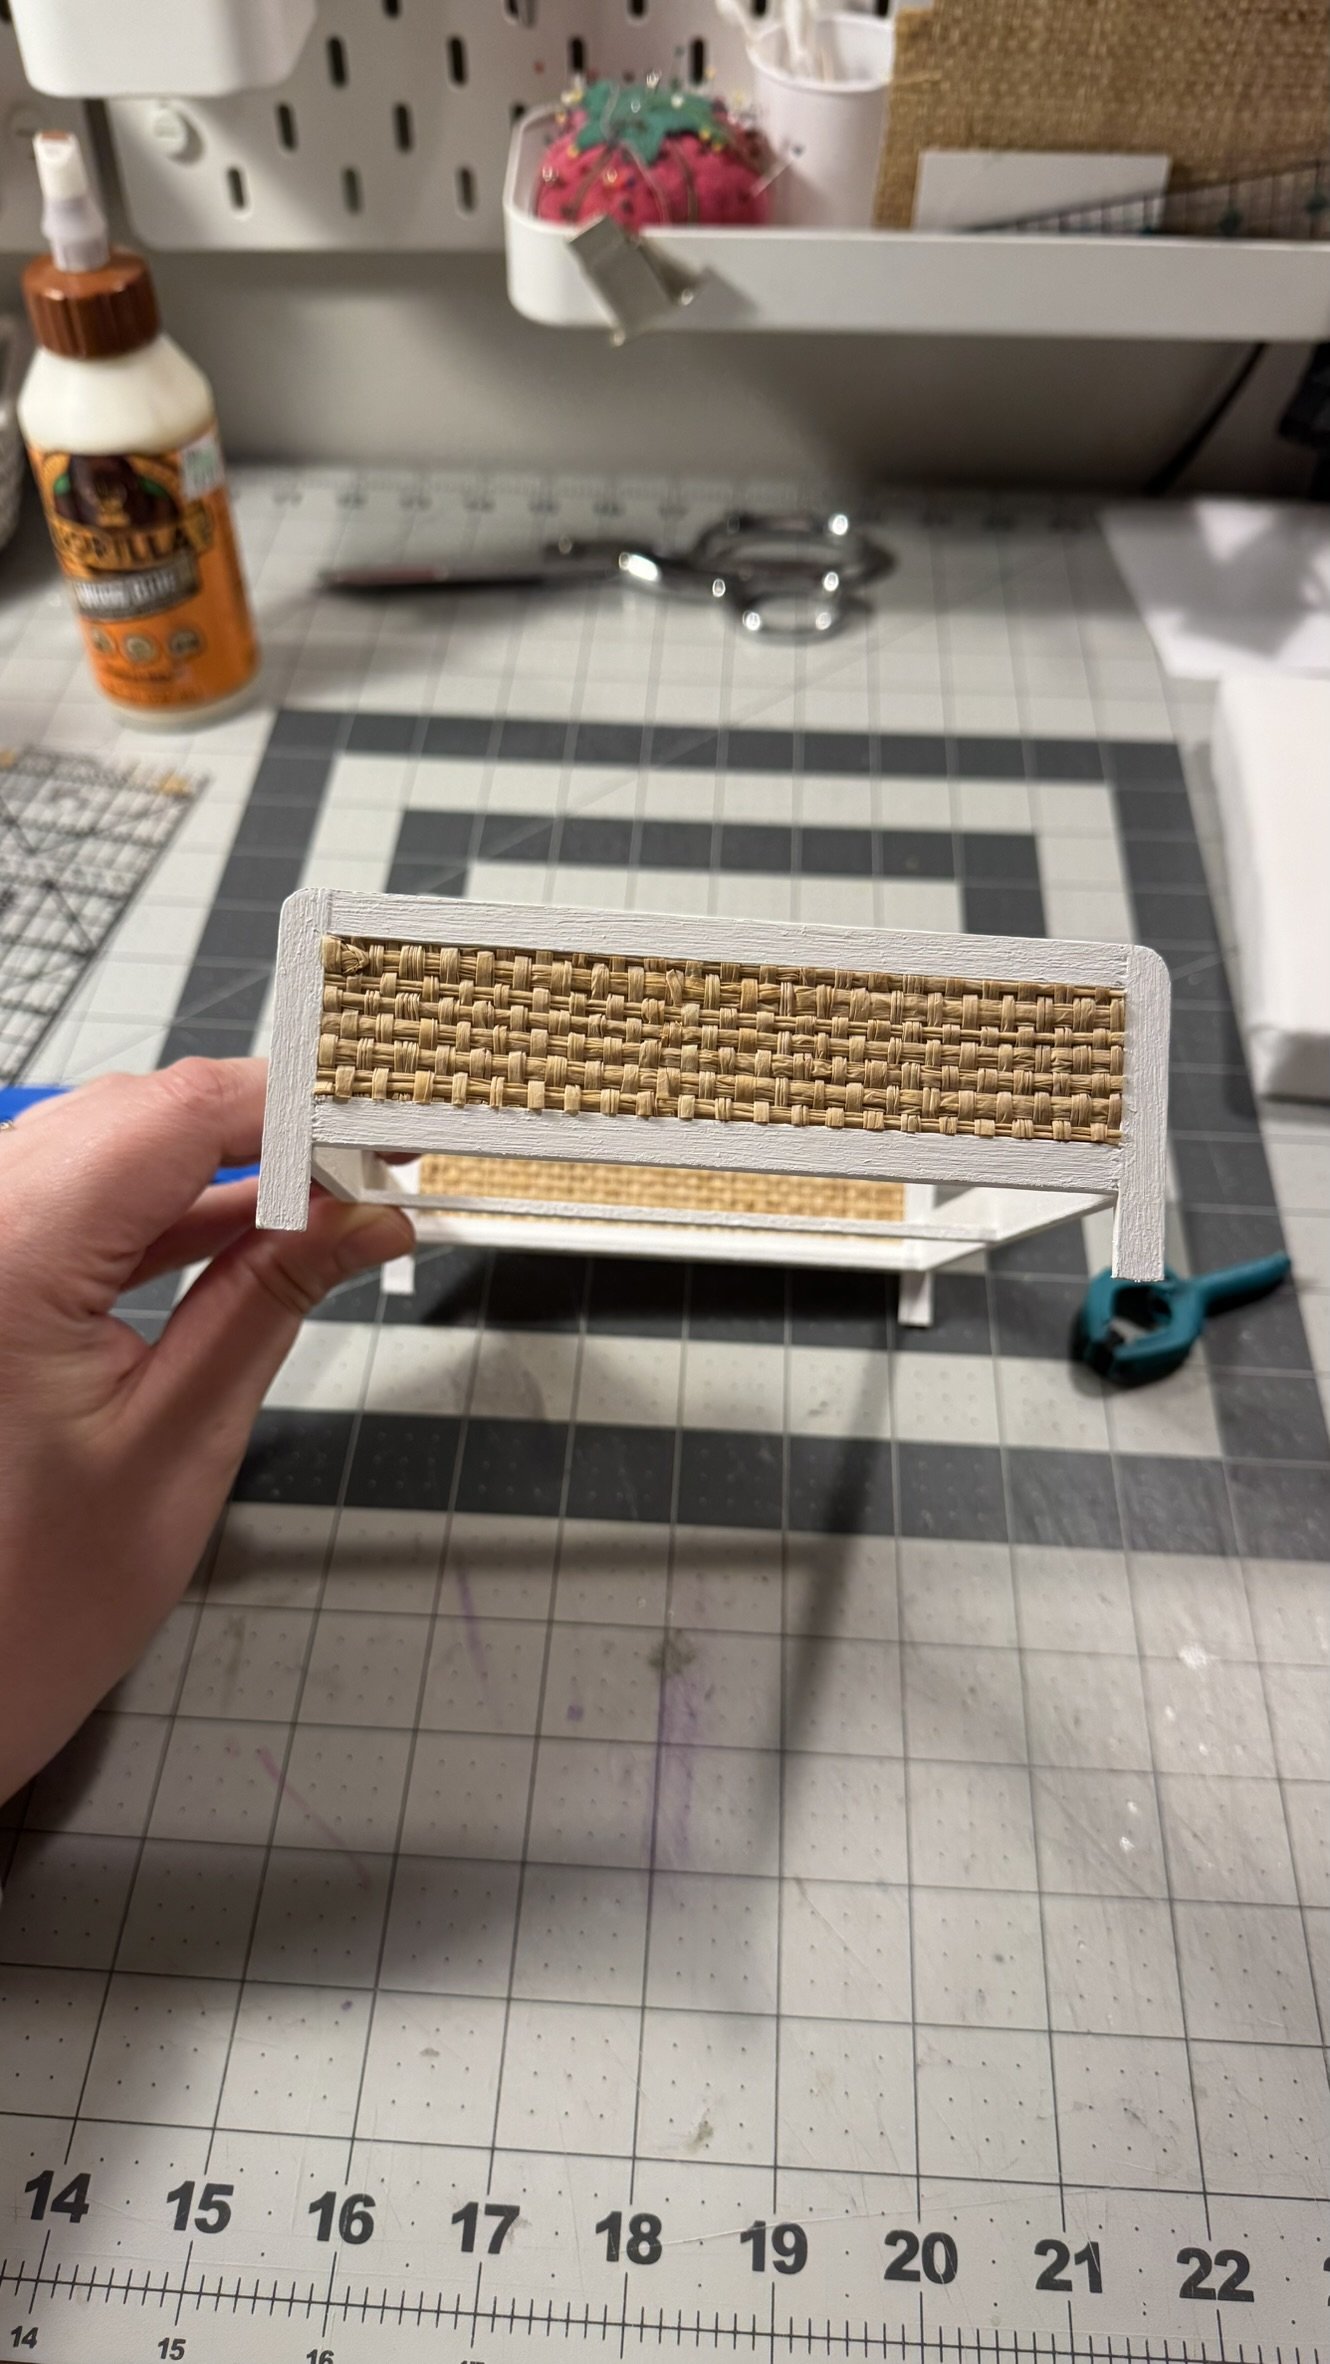
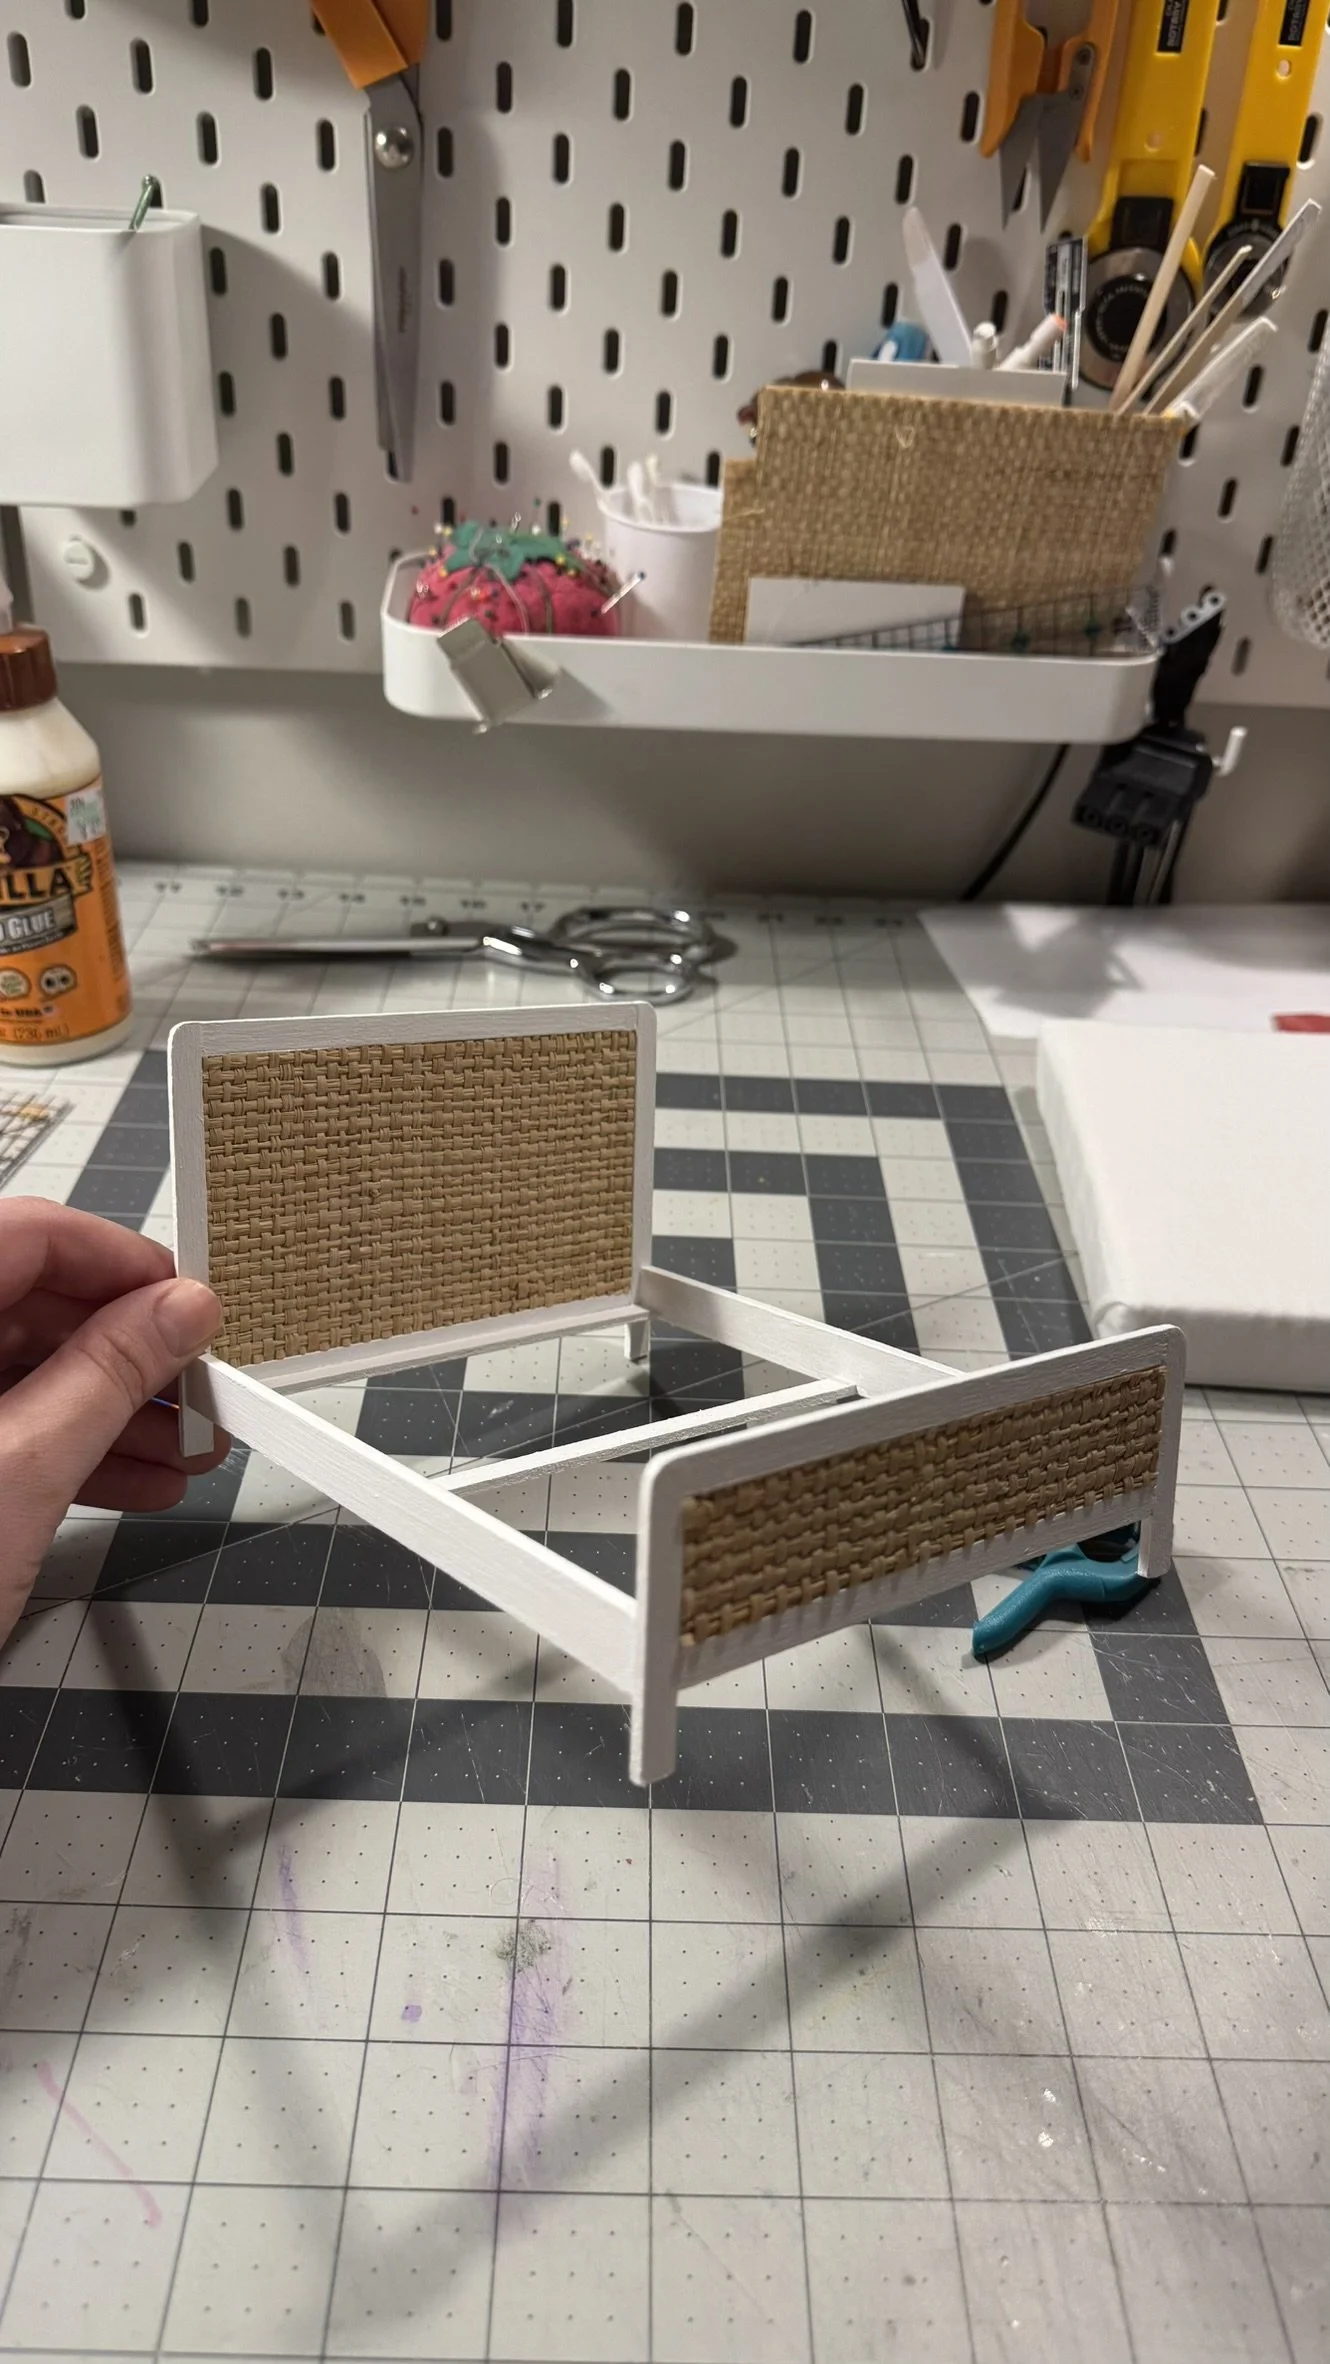
To assemble the headboard, take 2 pieces measuring 4 3/4” and 2 pieces measuring 3 7/8”. Glue these together in a rectangle, with the longer pieces going horizontal. For the bottom edge of the rectangle, scoot up your wood strip so it’s about 1/2” from the bottom. See photos below. Glue these pieces together with wood glue, making sure to keep 90 degree angles at each corner.
Assemble the foot board in the same way, using 2 pieces at 4 3/4” long and 2 pieces at 2” long. Again, the longer pieces will go horizontally, and leave a gap about 1/2” from the bottom of the rectangle.
Let the headboard and foot board glue dry really well. While you wait, assemble the side rails and mattress base using the thicker strips of wood and a handful of cross pieces. Line up two strips of 6 1/2” vertically, and add the 3 cross beams of 5 1/16” perpendicularly. Your cross beams should align with the top of the side rails, middle, and one more at the bottom edge. Before your glue these together, hold up your headboard to match the widths. You don’t want the mattress base to be wider than the headboard, so sand down the crossbeams if needed. Glue the mattress base together.

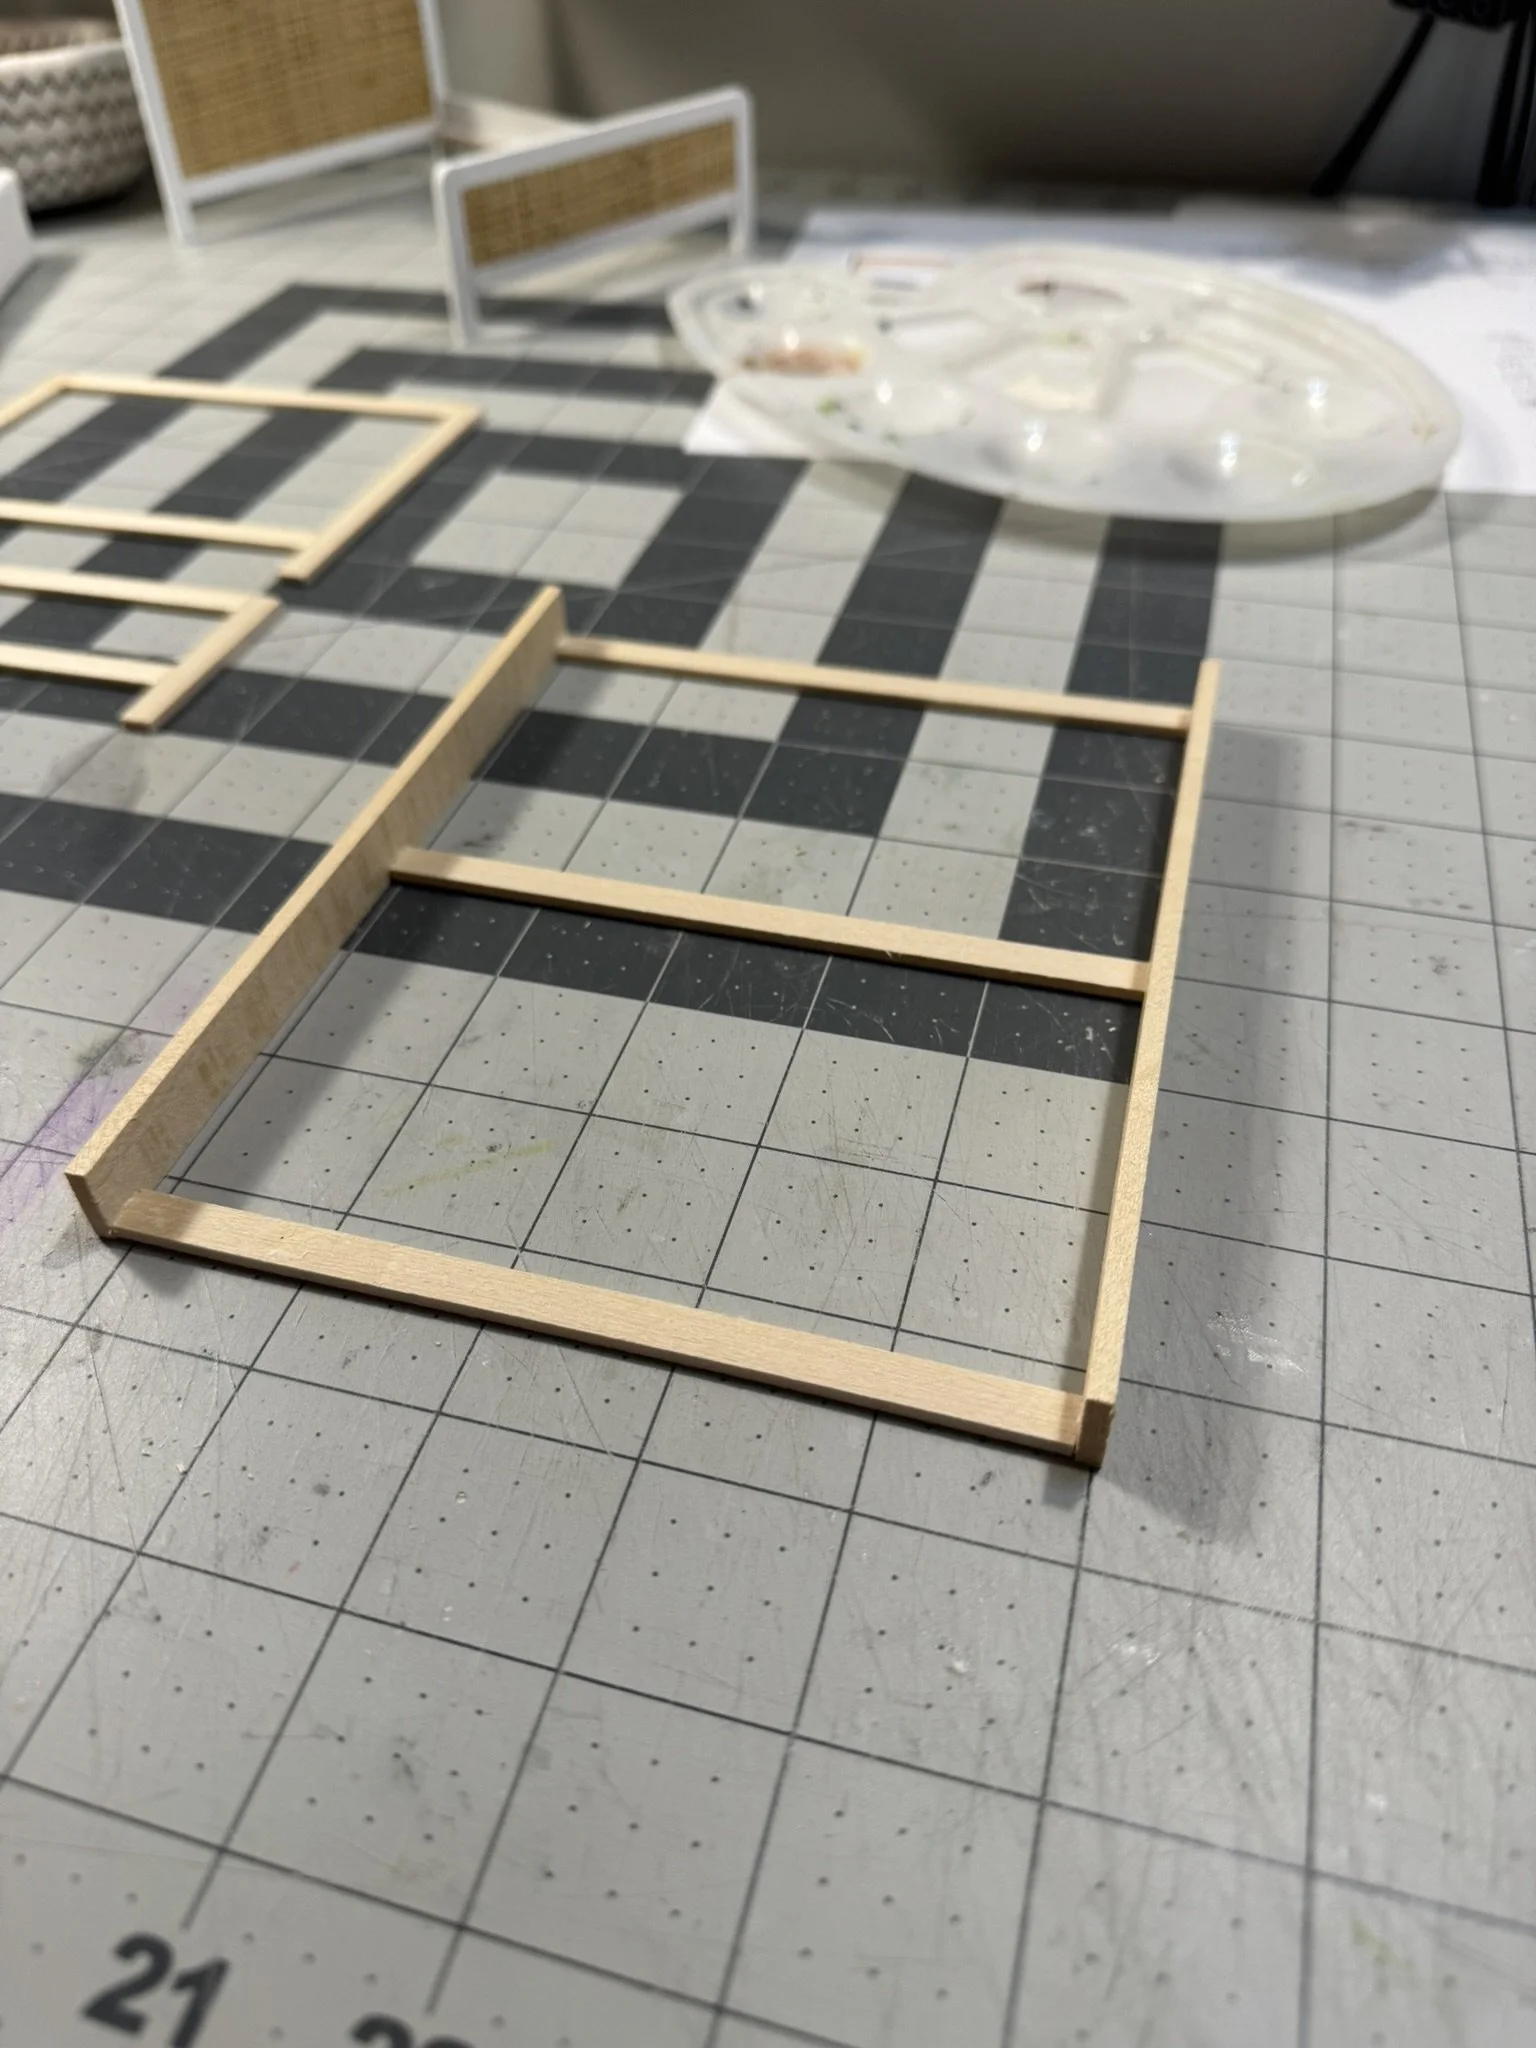
I chose to round the edges of my bed to give it a softer look. Make sure your headboard and foot board are dried really well before attempting this. Lay down a scrap of sand paper and vigorously sand the top corner edges. Once the point is softened, you can rotate the sandpaper gently around the corner to make a smooth, rounded edge.
Repeat again for the foot board. Smooth down any rough edges anywhere on your bed to prep for painting.


Make the Rattan Panels
Set your headboard and foot board on top of a scrap of mat board, and trace the inside opening of each with a pencil onto the mat board. Cut out the rectangles from the mat board, and make sure they fit inside the bed pieces. They should fit fairly snug, but not bend inside the headboard.
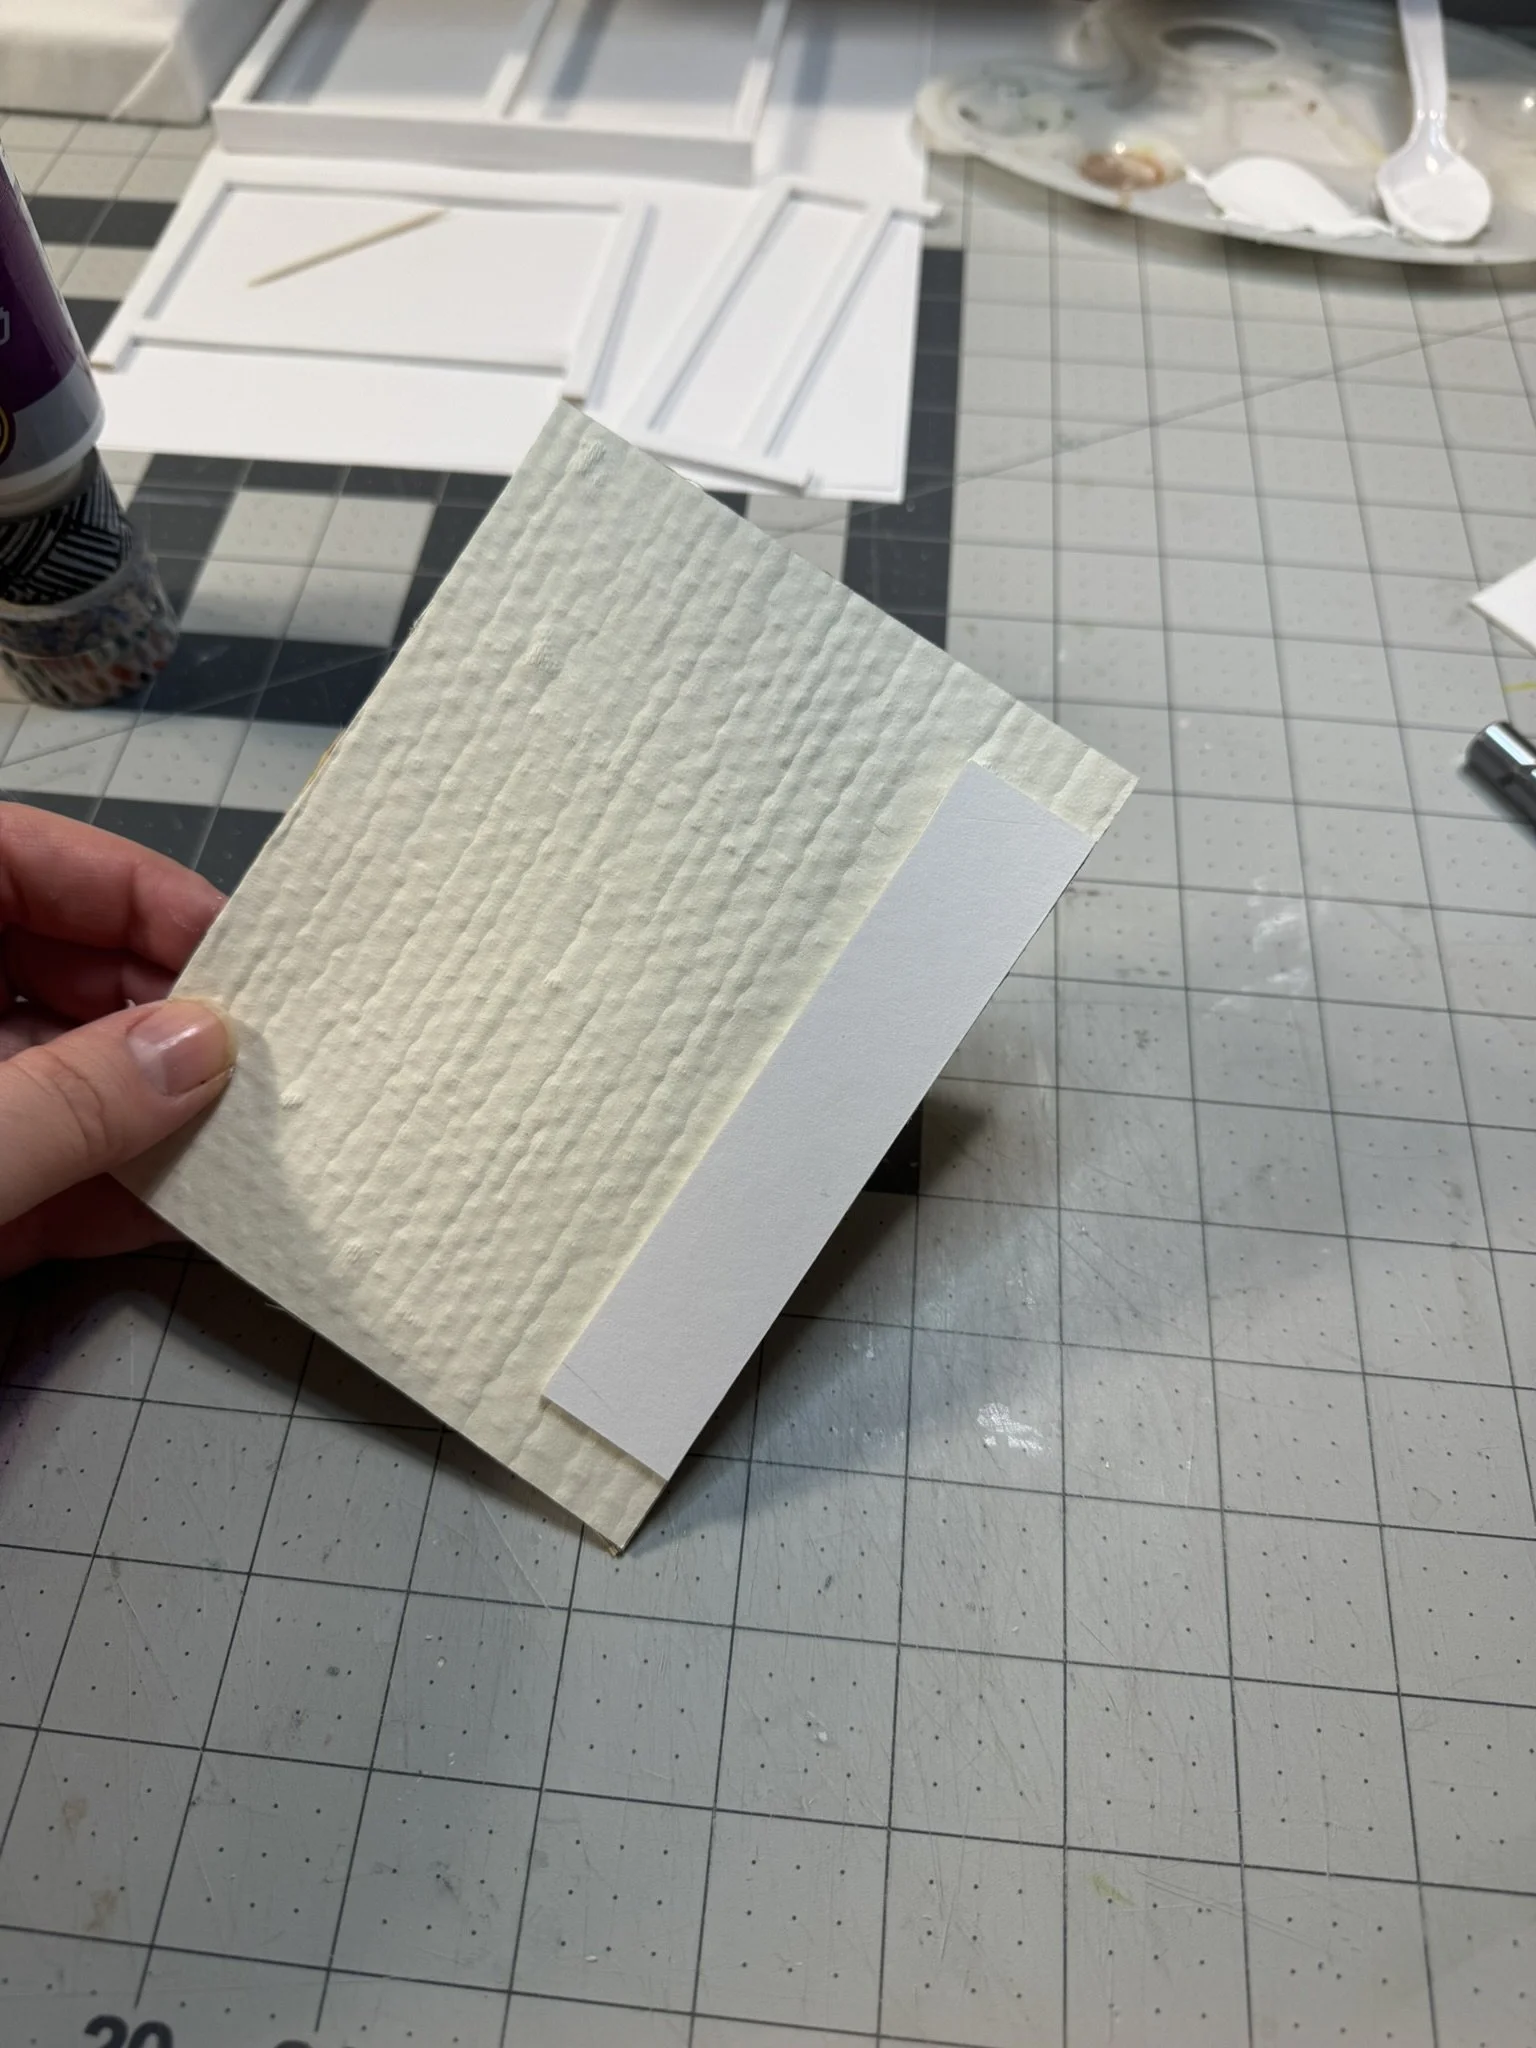
Glue the rectangle mat board templates to the back of the rattan, and cut out. Do another test fit and trim down any edges if needed.

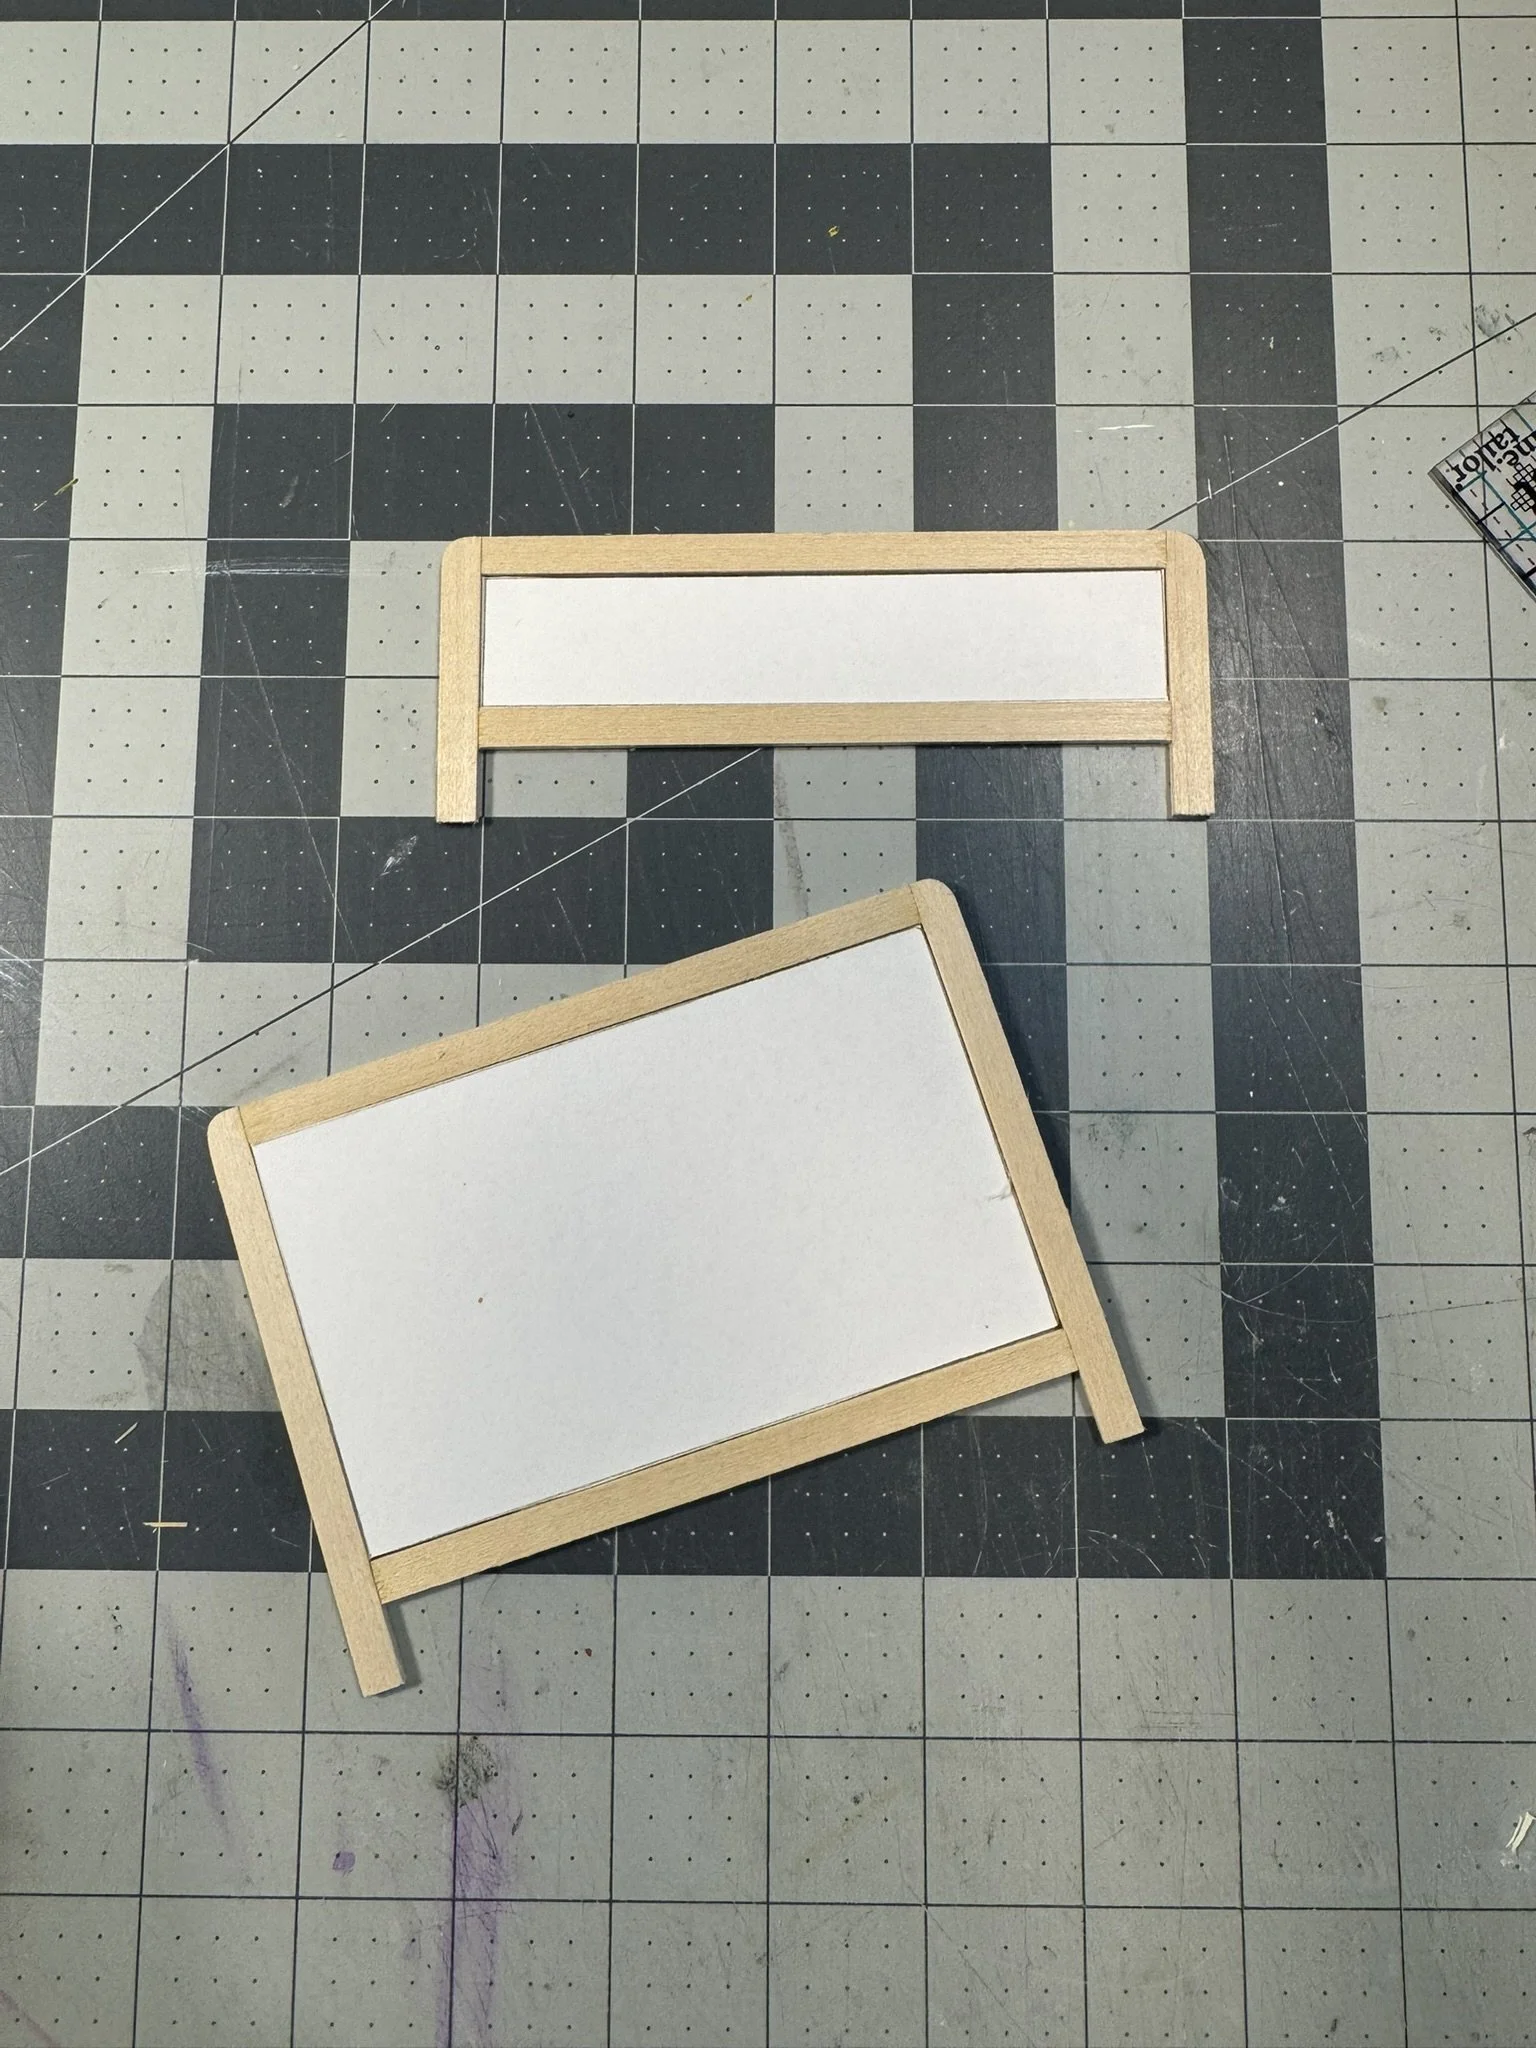

Don’t install the rattan panels yet. Go ahead and paint all the bed pieces now, so you don’t risk getting paint on the rattan. Once the paint has dried, you can pop the rattan panels back inside the bed, and secure with a dot of glue on the back.
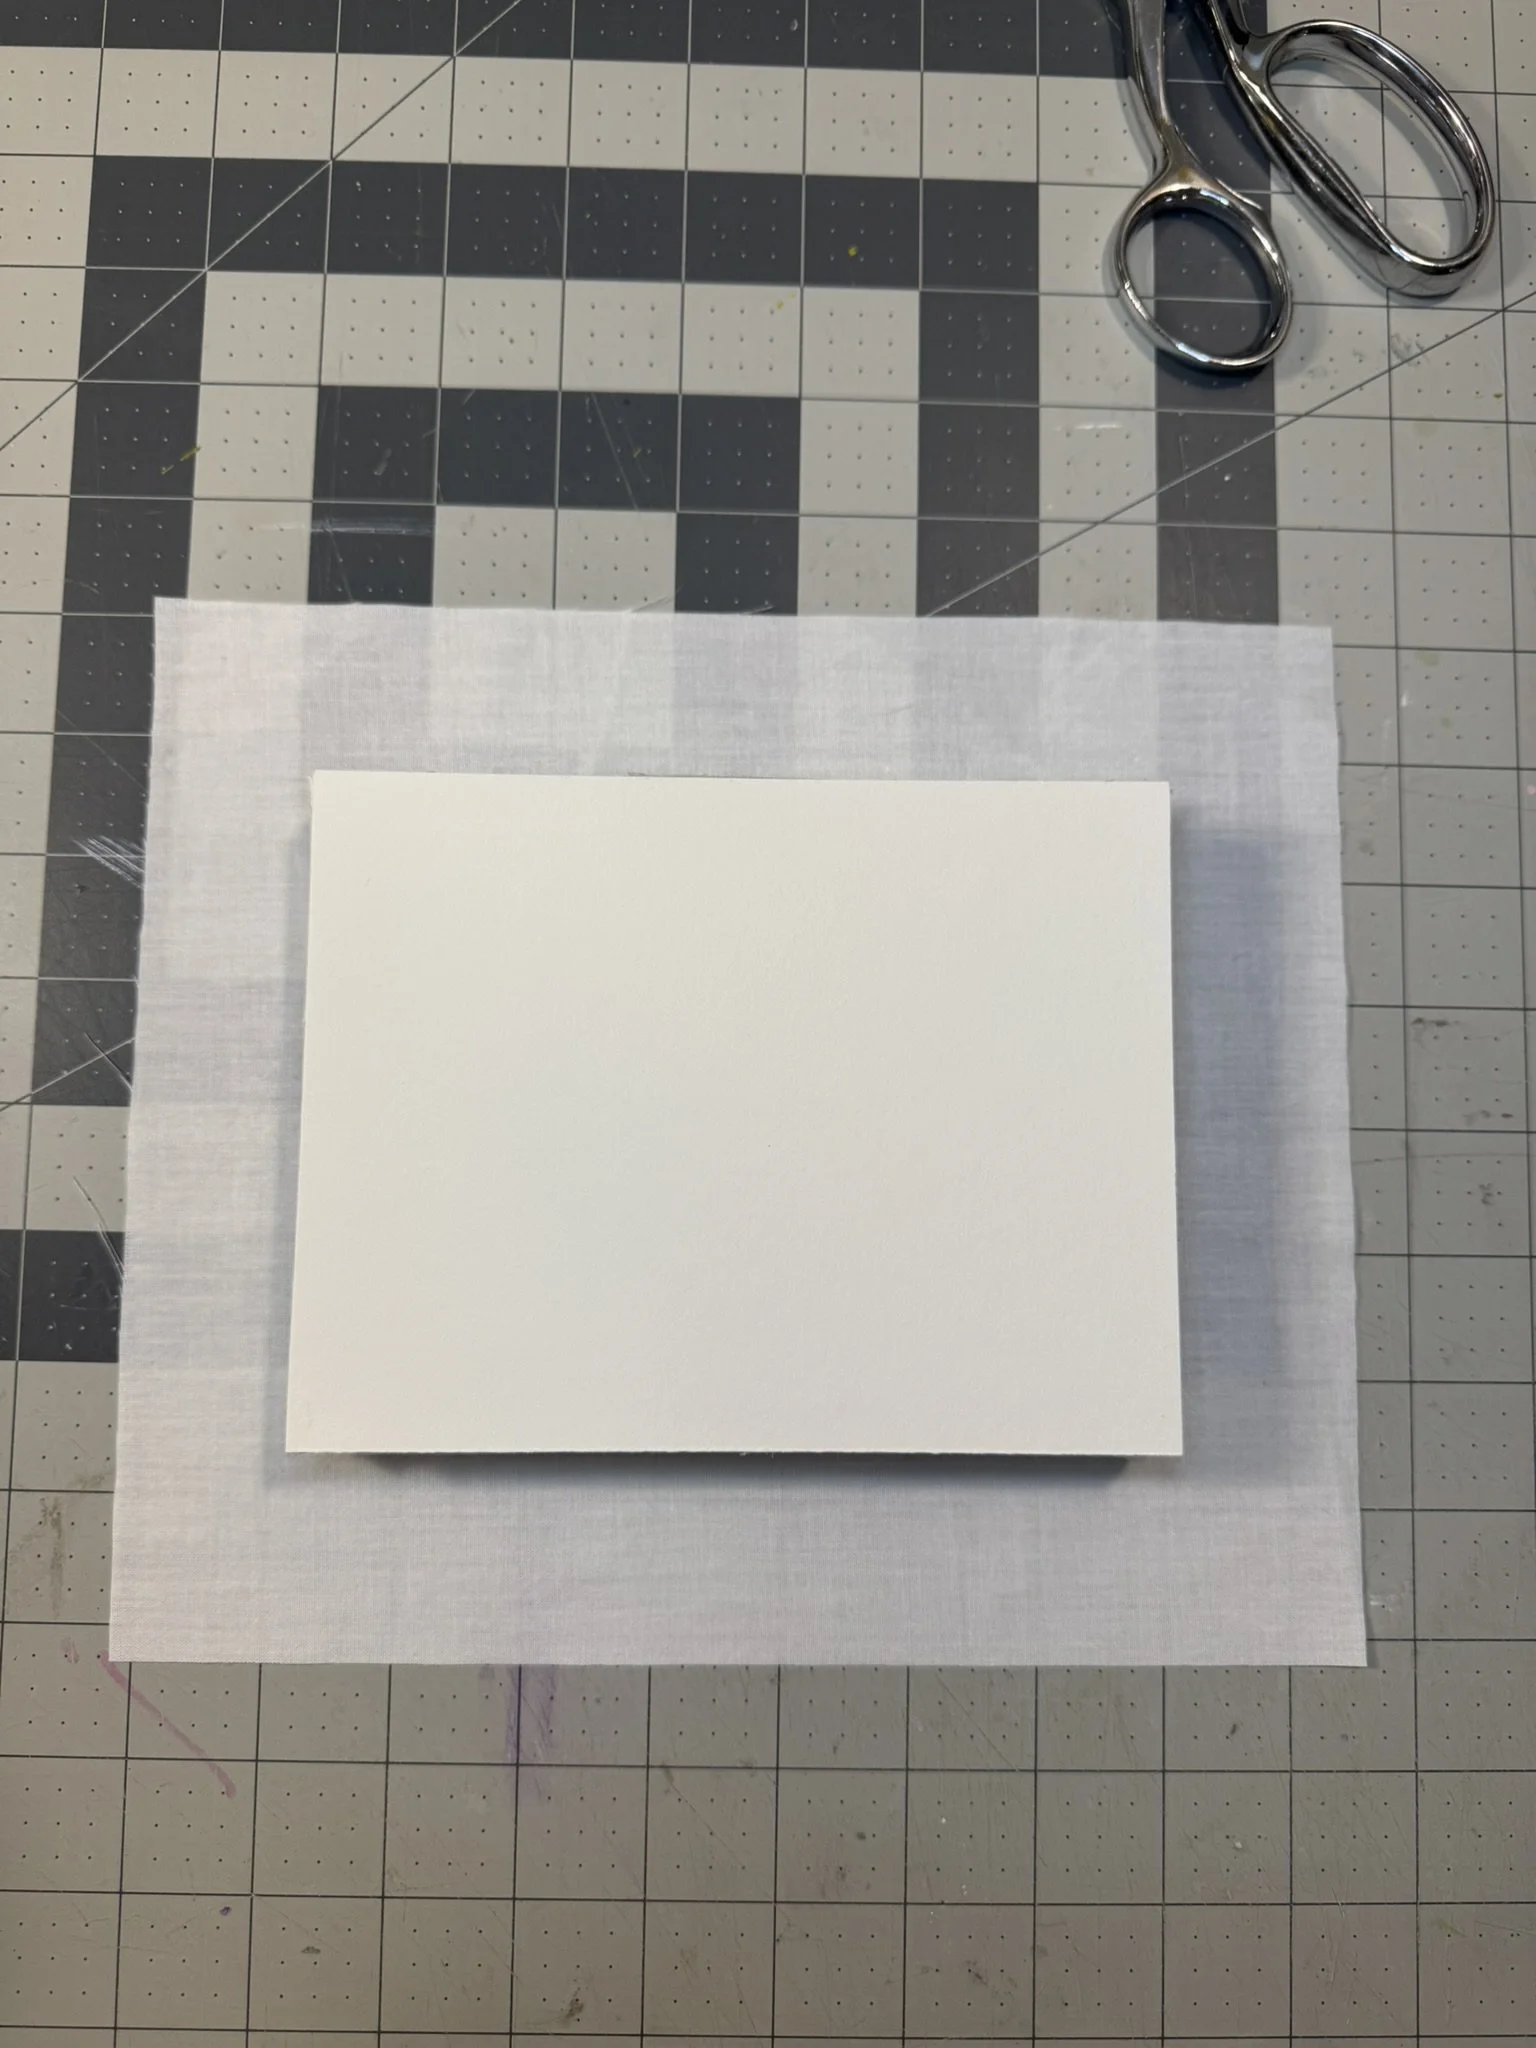
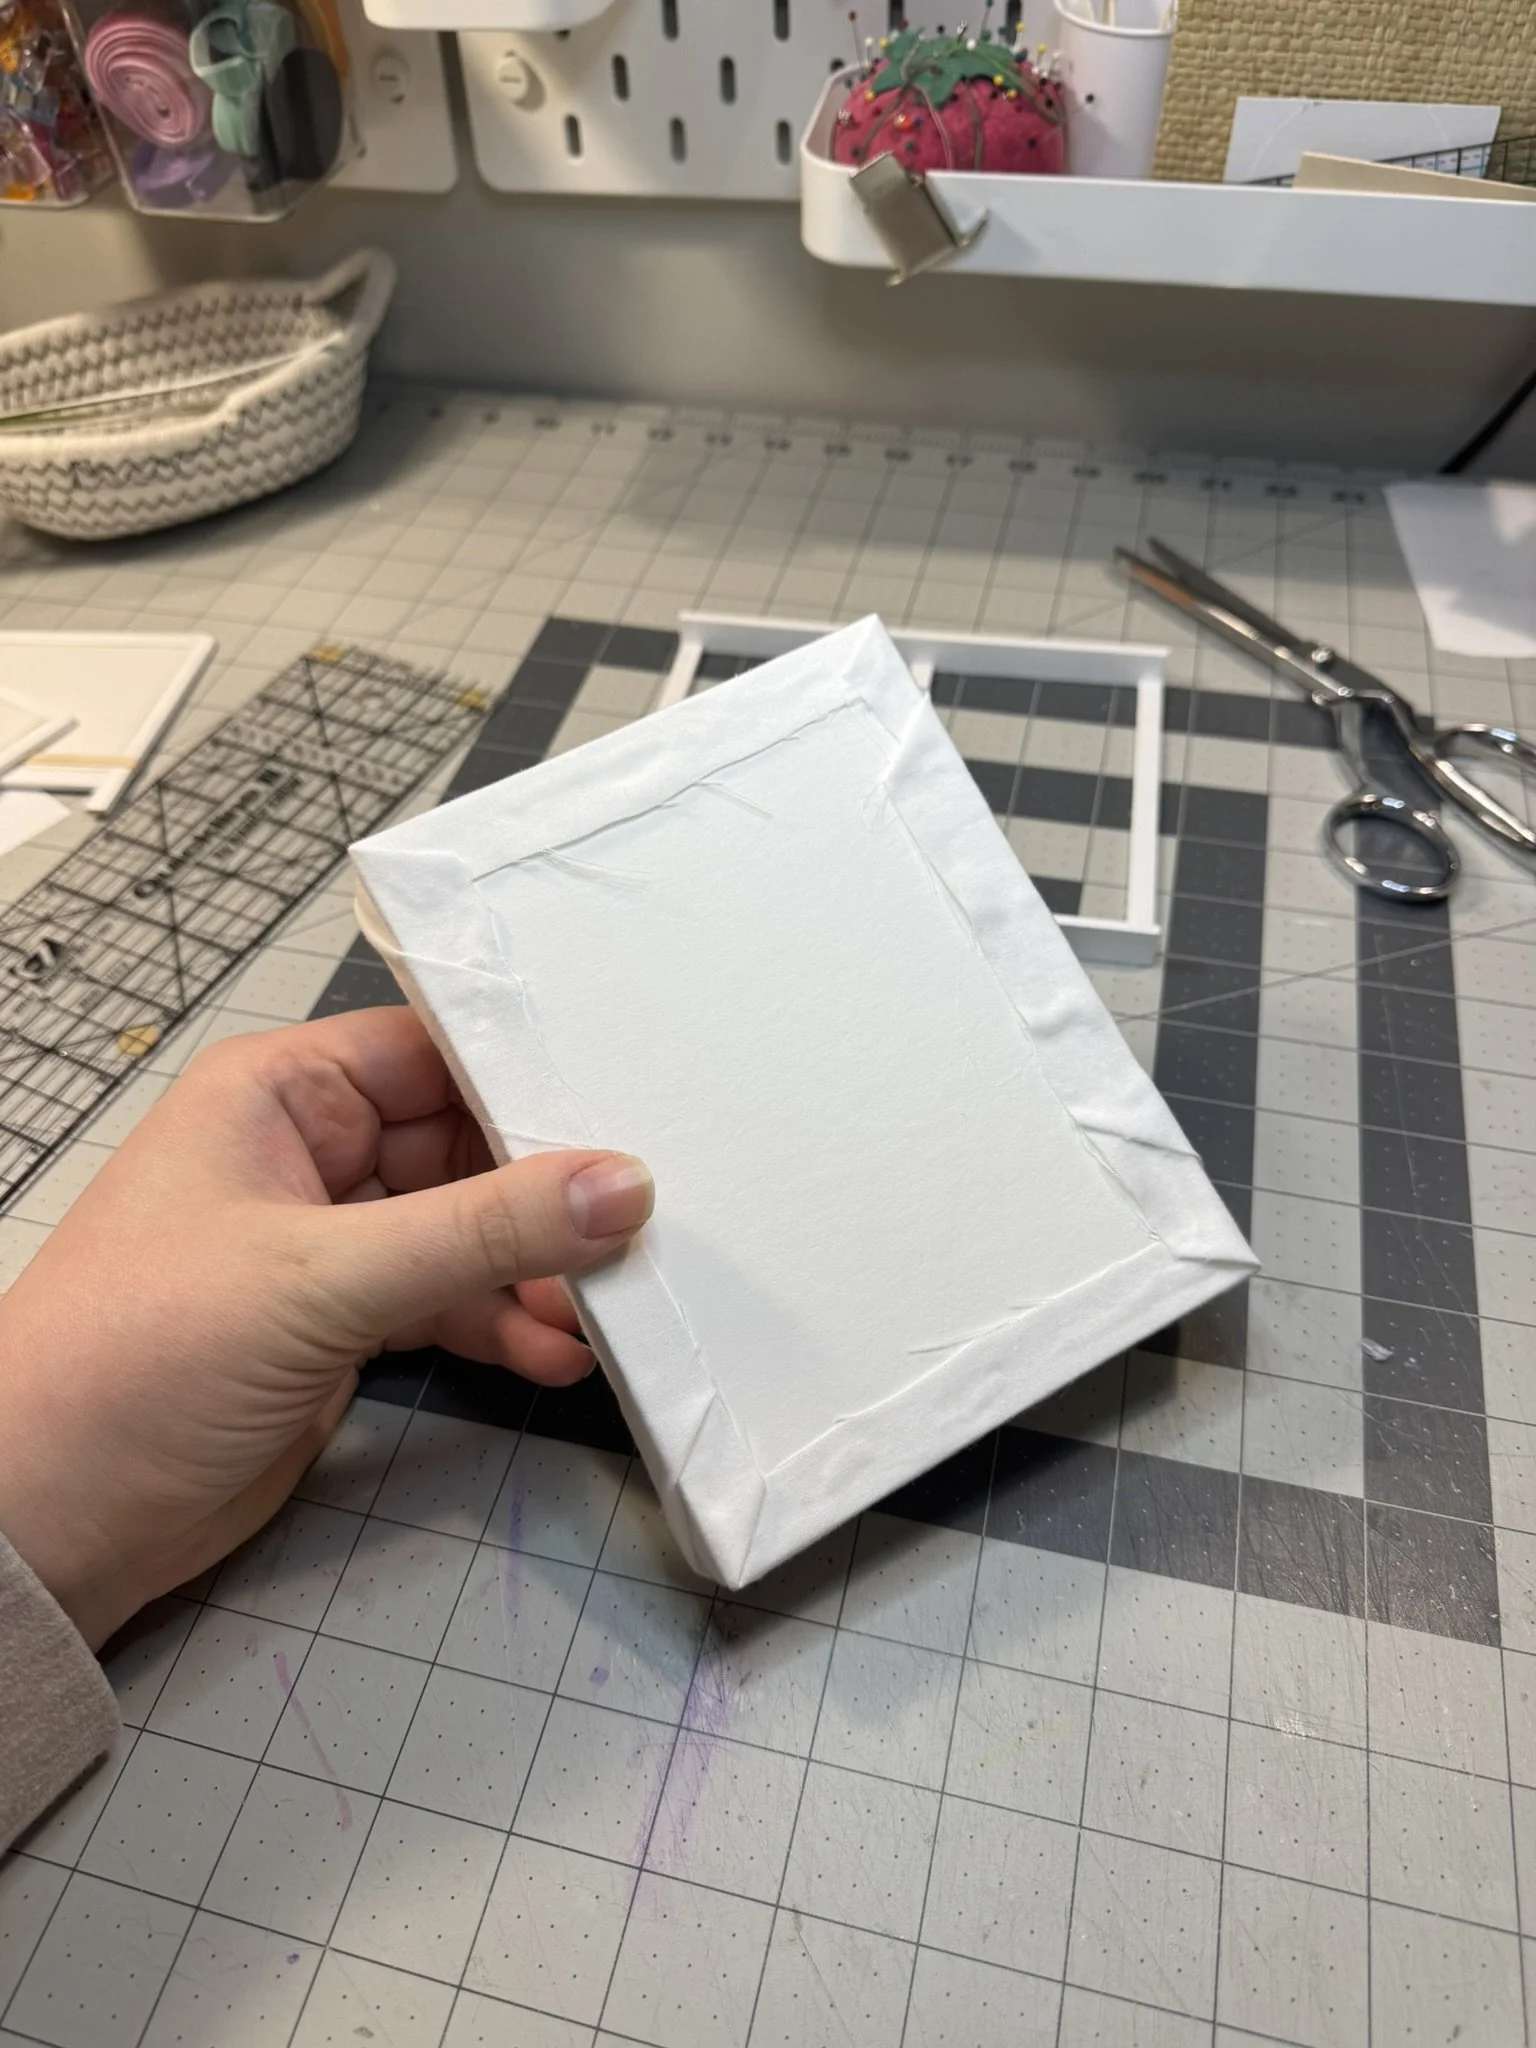
Make the Mattress Box
The style of this bed requires a taller mattress than what I showed in this other tutorial. You will need to build a simple box that fits inside the bed, and cover it with fabric. Cut out your box materials based on the list below. My mat board is green on one side from another project, so I made sure to have the white side facing out.
Note, your bed measurements may differ slightly depending on how exact your cuts were in the above steps. Measure the length and width of your wood mattress base, and cut your mat board at least 1/4” smaller.
Mattress Box Cut List
Cut from mat board:
(2) - 6 3/8” x 4 7/8” (top and bottom)
(2) - 7/8” x 6 3/8” (side strips)
(2) - 7/8” x 4 3/4” (top and bottom strips)
I used hot glue to assemble this box since it was quicker. But you could just as easily use tacky glue or another craft glue. Glue the long side strips onto one of the larger rectangles, then glue the top and bottom strips to make a open box. Glue the top on last. Check to make sure the box fits inside the mattress base.


Cover your box with one layer of felt that fits on top. It does not need to fold around the edges. Then using a scrap of white fabric (I used an old sheet), cover the box with the white fabric, securing on the bottom with glue. Fold the corners at an angle, similar to tucking a flat sheet around a mattress. Now you are ready to assemble the bed!

Assemble the Rattan Bed
Grab your tacky glue, and run a small bead alongside the bottom edge of the headboard. Glue the mattress base flush against this edge, so that the mattress support beam lines up with the bottom of the headboard rail. Repeat on the other side with the foot board.

Bedding Ideas and Accessories
I whipped up a quick coverlet from some denim shirting fabric and sewed pillows from leftover white linen. See this tutorial on easy dollhouse pillows, including an adorable circle pillow. I grabbed a scrap of Rifle Paper fabric and cut out a quick throw for the end of bed. I used Fray Check on the edges and it has been holding up well so far!


Be sure to tag me on social media if you make this bed — I would love to see it!


